Keyboard Replacement · RAM Upgrade · Full Disassembly & Reassembly
This lab documents the complete lifecycle of an IT hardware repair and upgrade project — from fault diagnosis and structured research through to component sourcing, full chassis disassembly, keyboard replacement, RAM upgrade, reassembly, and systematic post-repair verification.
The device was purchased with a known keyboard fault. Rather than simply replacing the part, the project began with structured research: identifying the root cause of the fault, confirming the correct replacement part, assessing the platform's upgrade potential, and studying the disassembly procedure before touching the hardware. This approach reflects how hardware work should be conducted in a professional IT environment — methodically, with every decision grounded in research rather than assumption.
| Component | Specification |
|---|---|
| Model | HP EliteBook 845 G7 |
| Processor | AMD Ryzen 5 PRO 4650U with Radeon Graphics @ 2.10 GHz |
| RAM (original) | 8 GB DDR4 3200 MHz SODIMM — single channel, one slot occupied |
| RAM (upgraded) | 16 GB DDR4 3200 MHz SODIMM — dual channel, 2 × 8 GB matched pair UPGRADED |
| Storage | 238 GB NVMe SSD (48 GB used) |
| Graphics | AMD Radeon™ Integrated Graphics (496 MB shared) |
| Operating System | Windows 11 |
On receipt of the device, a full inspection was carried out before any disassembly. The objective was to understand the actual failure mode — not assume it.
Three keys — R, T, and Y — were completely non-functional. All adjacent keys tested as operational.
Physical inspection revealed the previous owner had attempted a DIY repair. The aluminium stabiliser hinges on all three keycaps were sheared — consistent with improper keycap removal (lifted at an angle rather than straight up).
Individual hinge repair was ruled out as non-viable. A full keyboard replacement was confirmed as the correct resolution. All other components were verified functional prior to proceeding.
Before ordering any parts or beginning disassembly, the following research was completed. This phase is a critical professional discipline — it ensures correct parts are sourced, no steps are improvised, and the repair is done once, correctly.
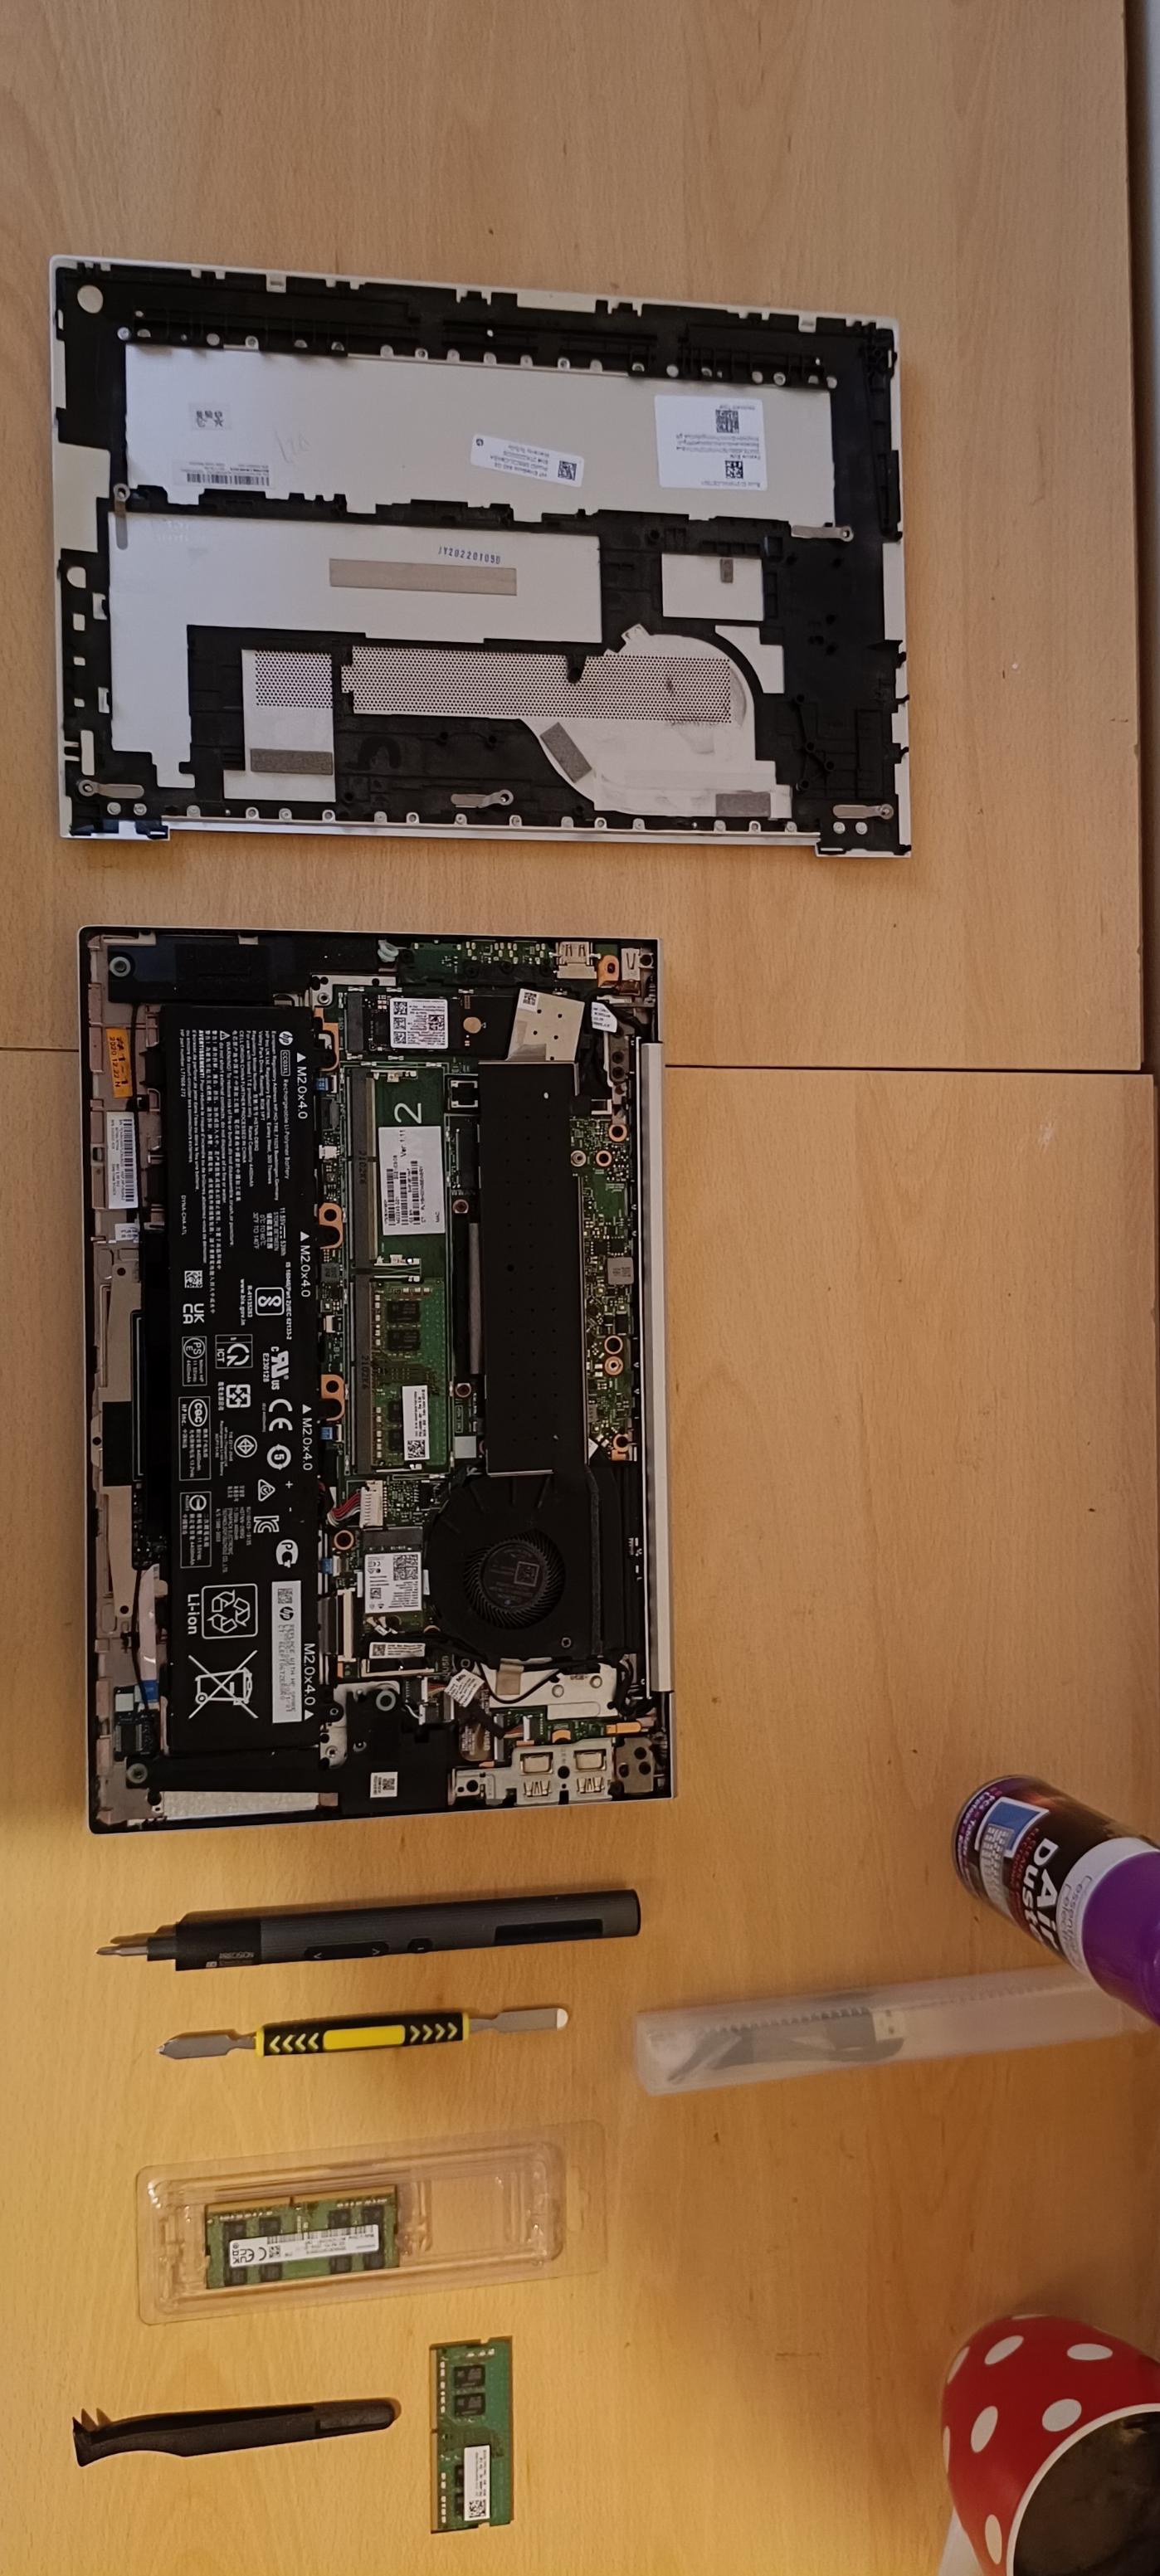
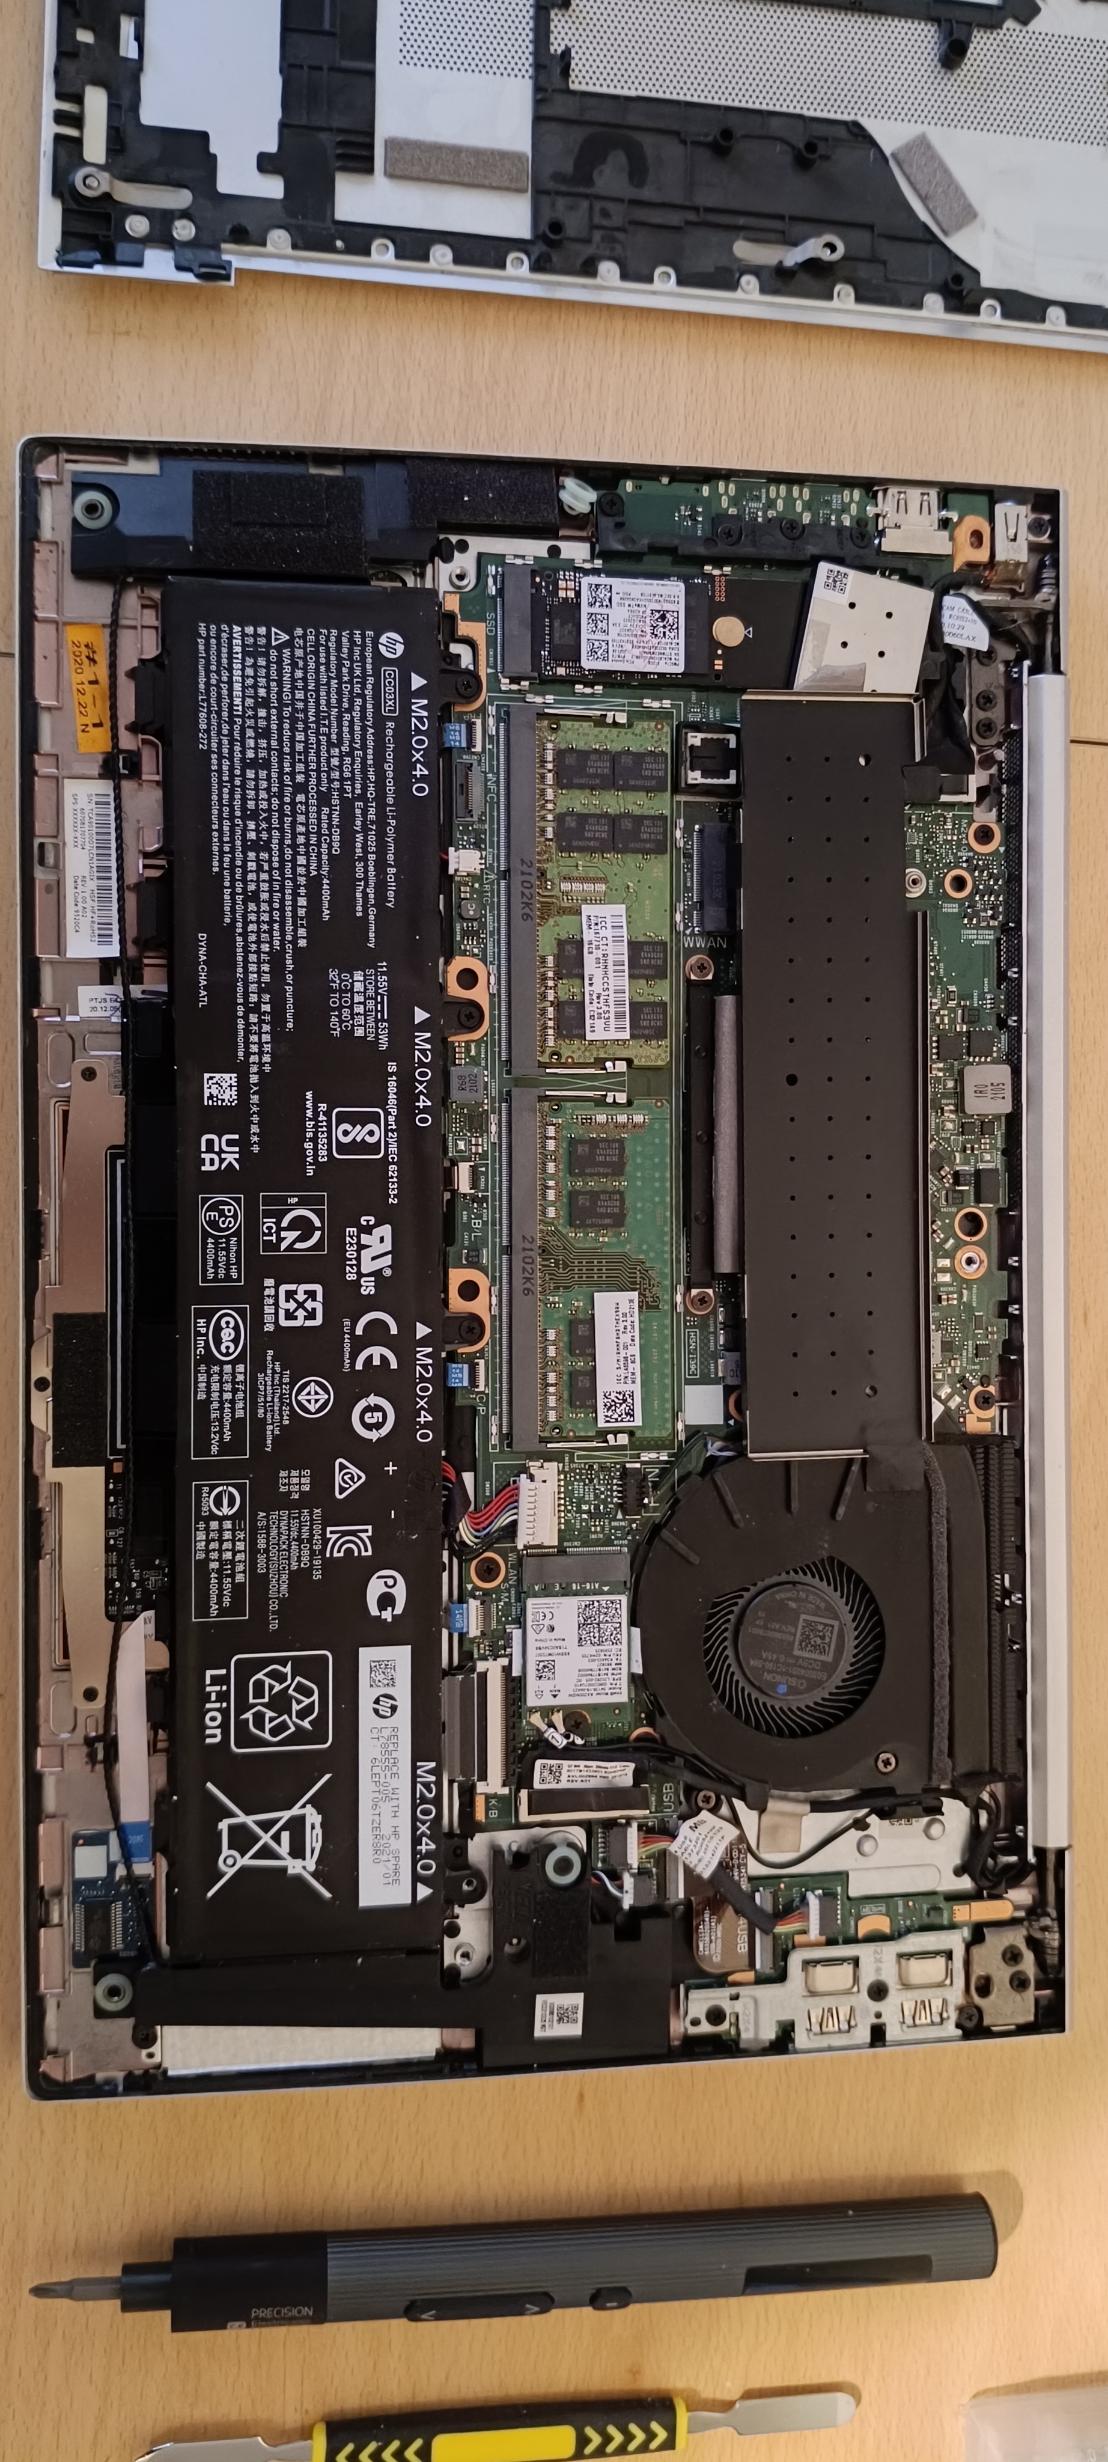
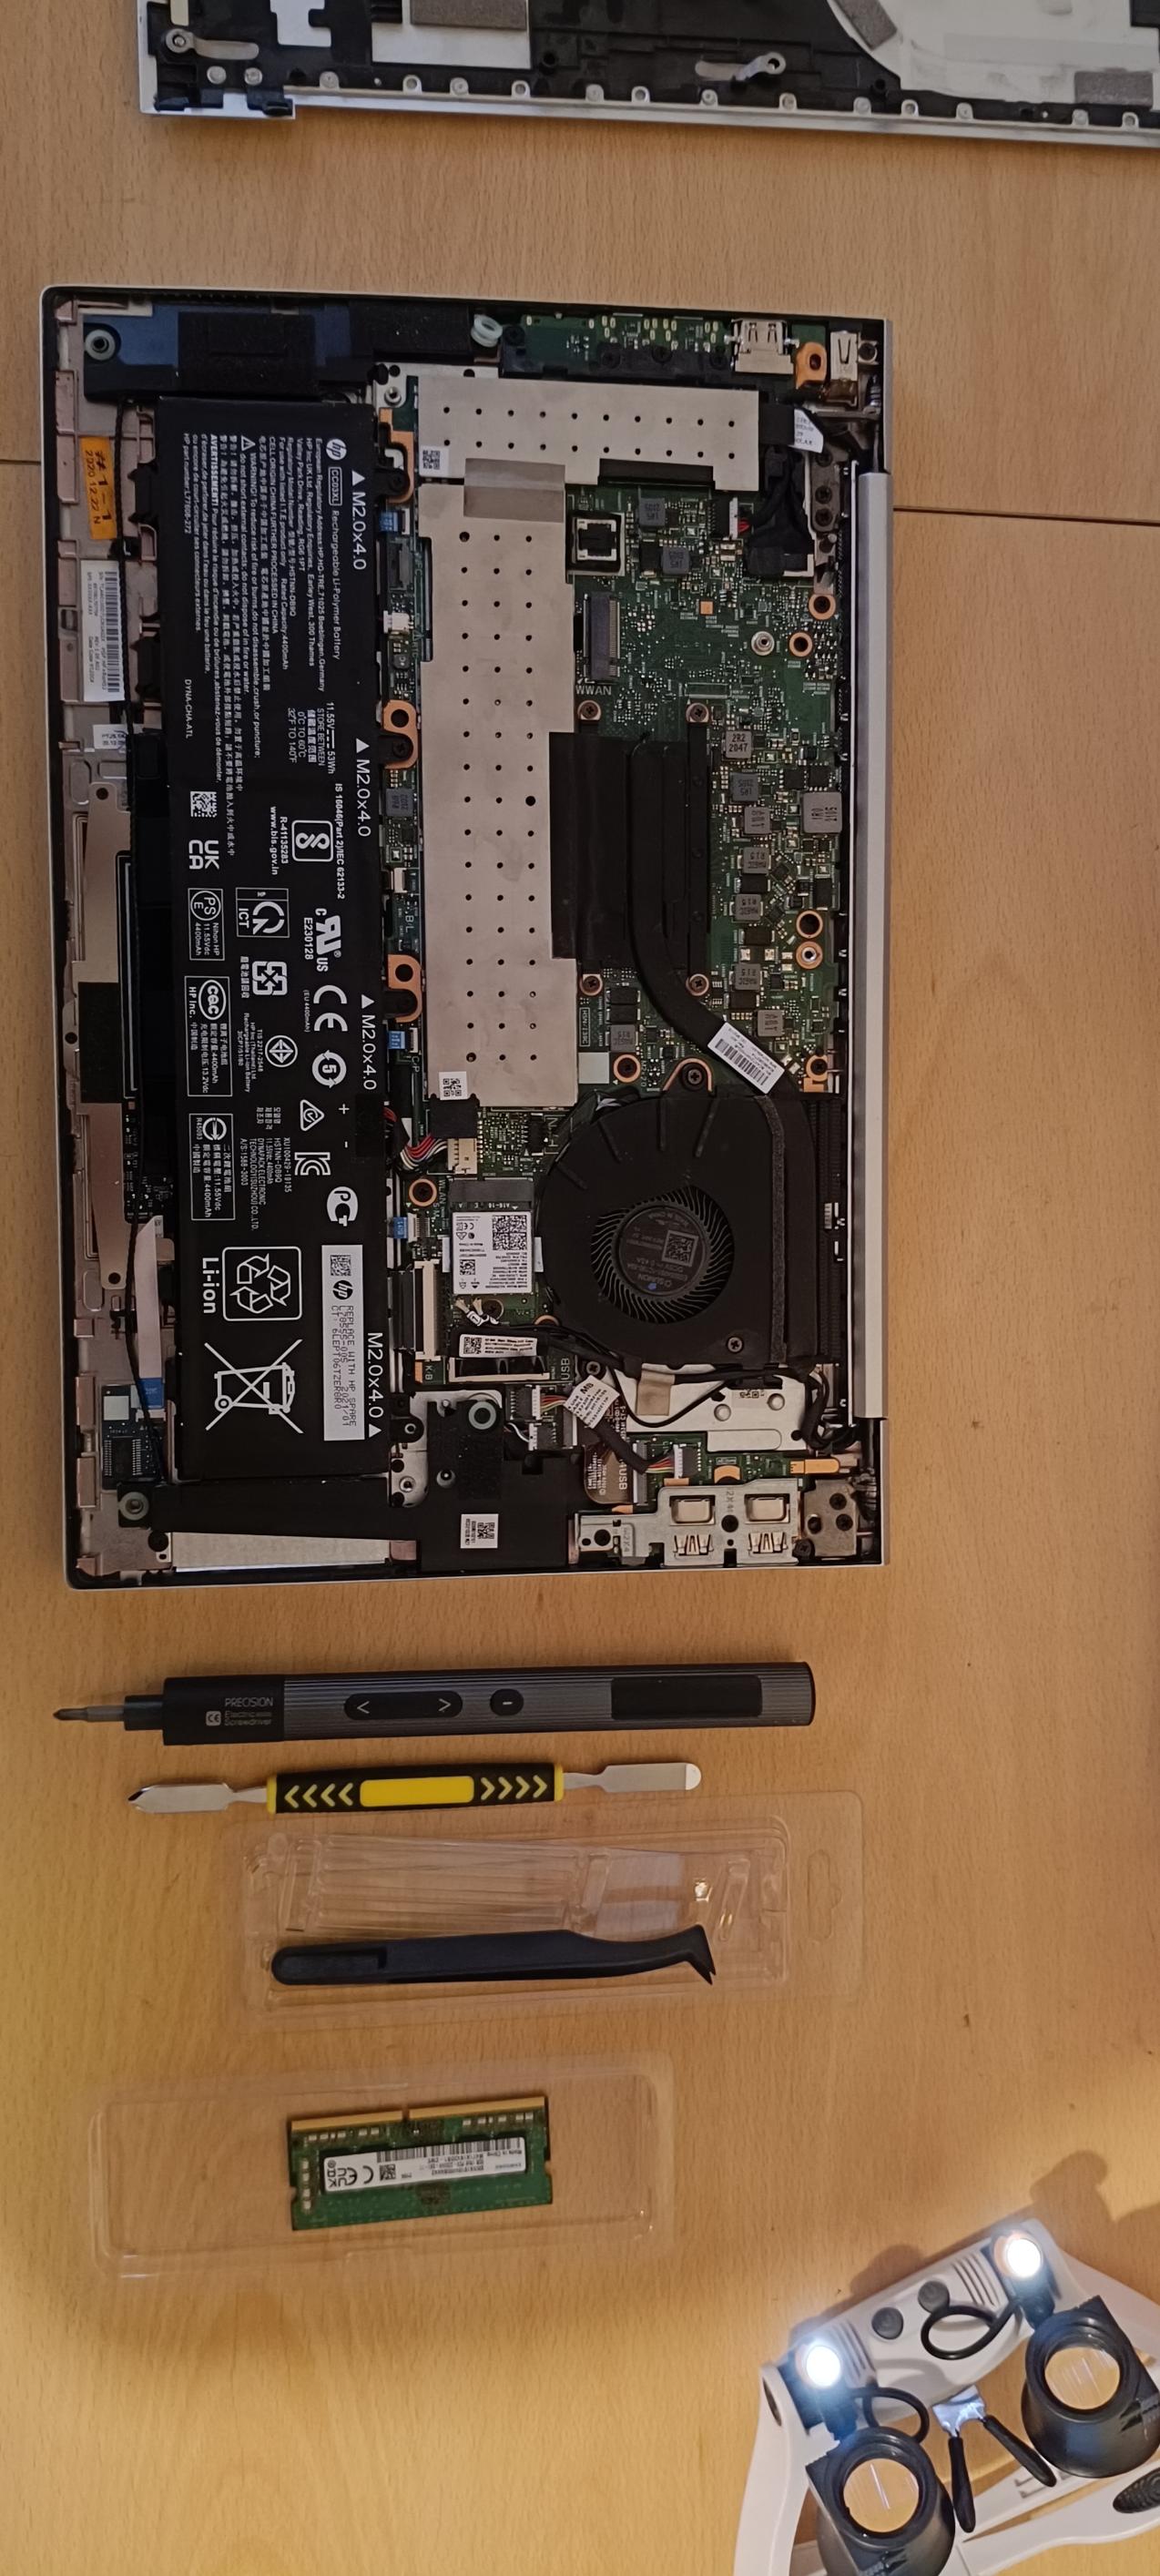
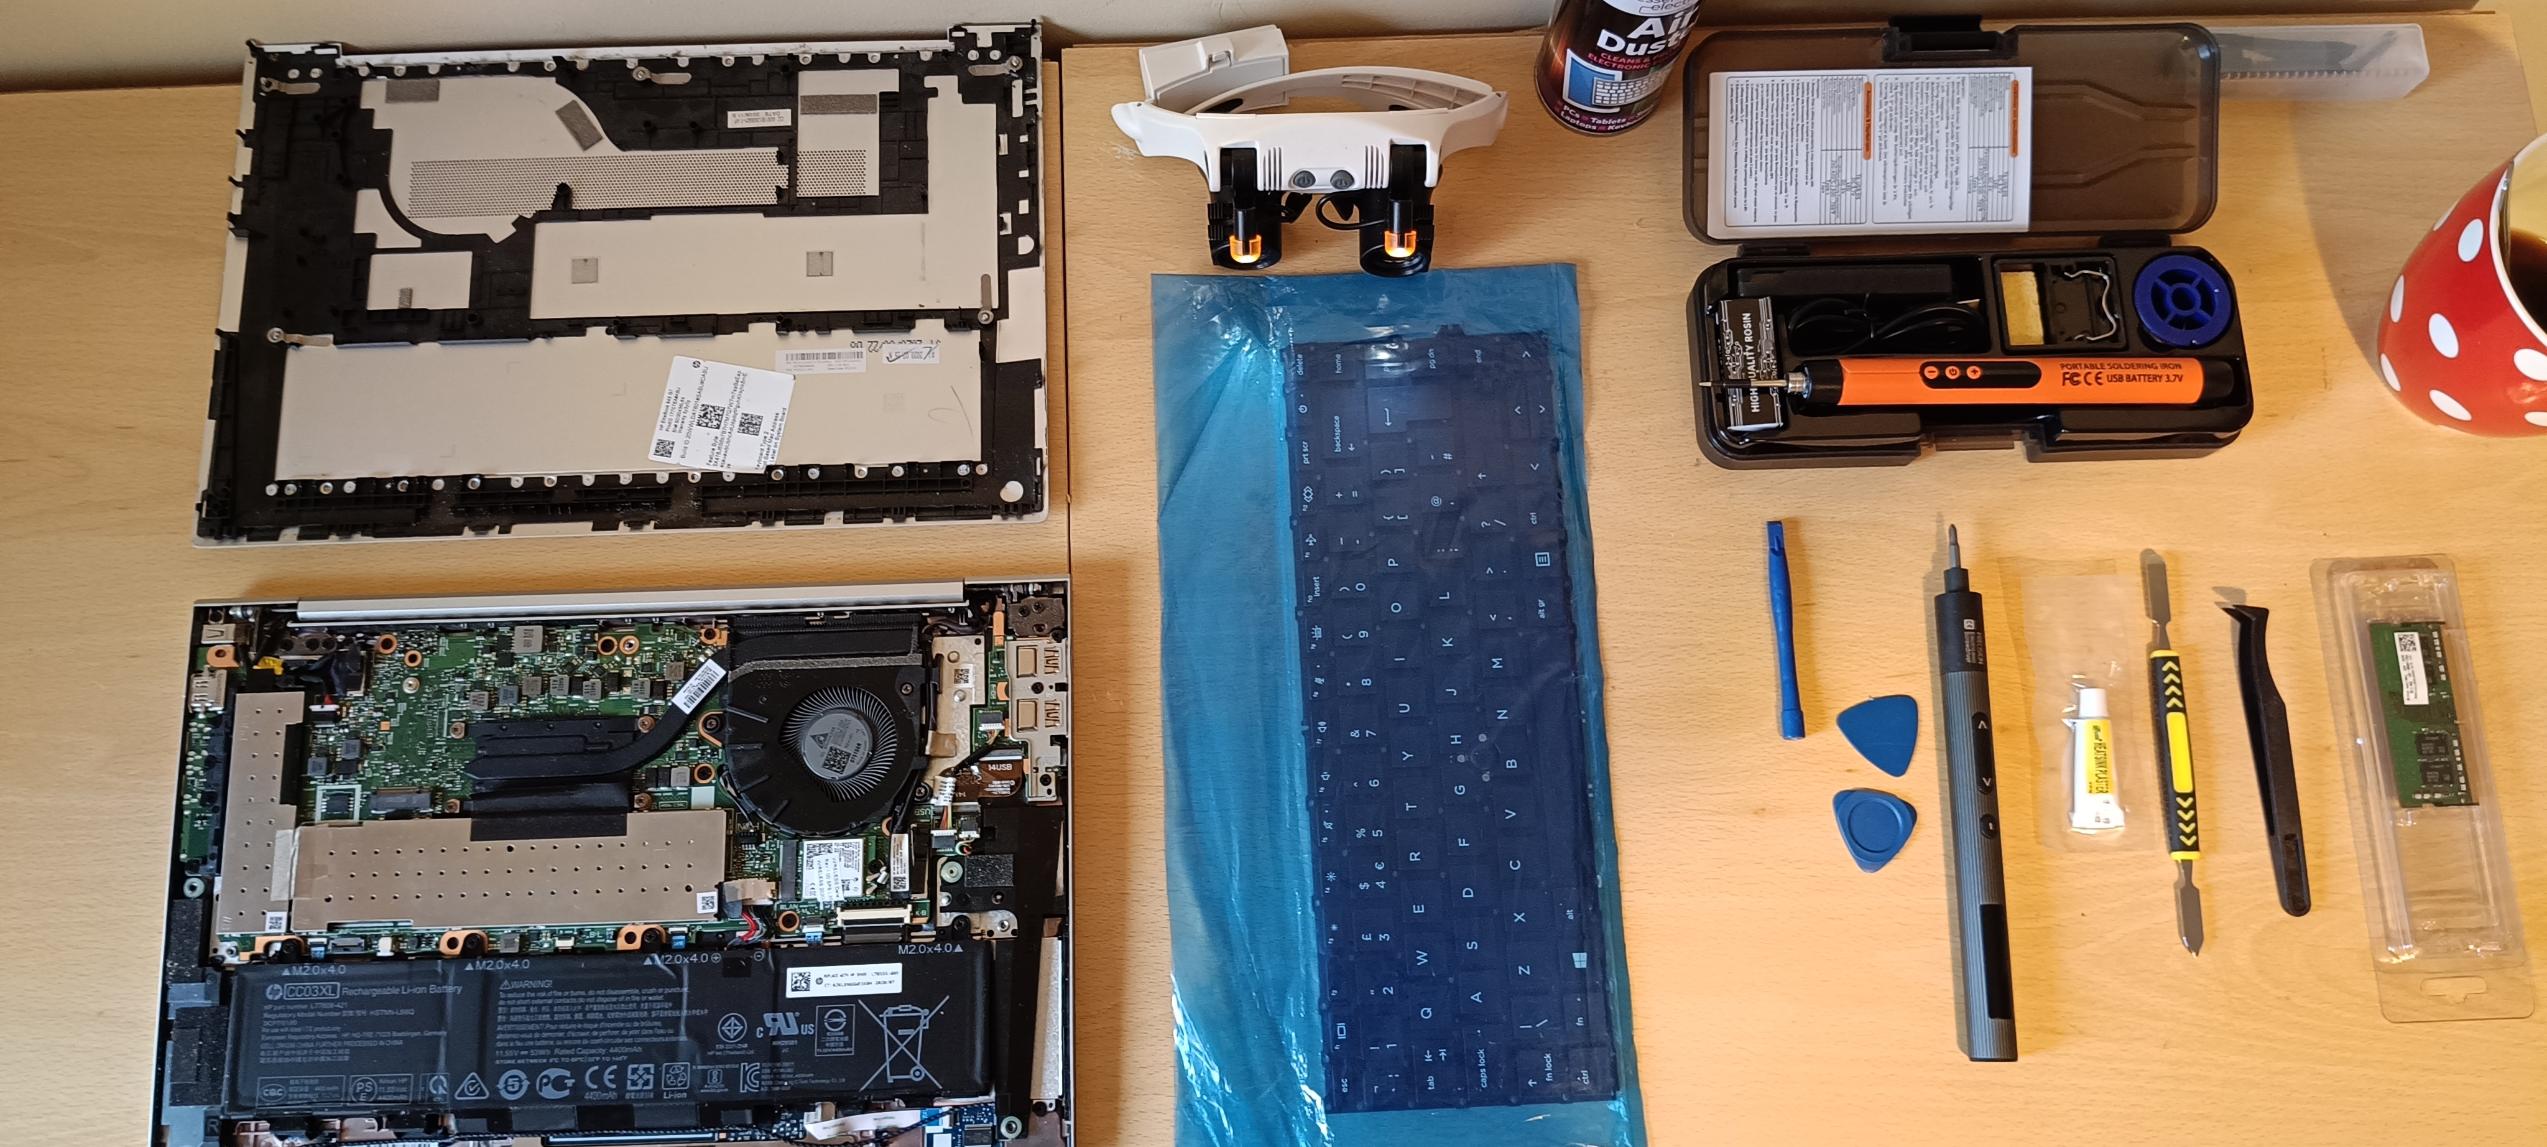
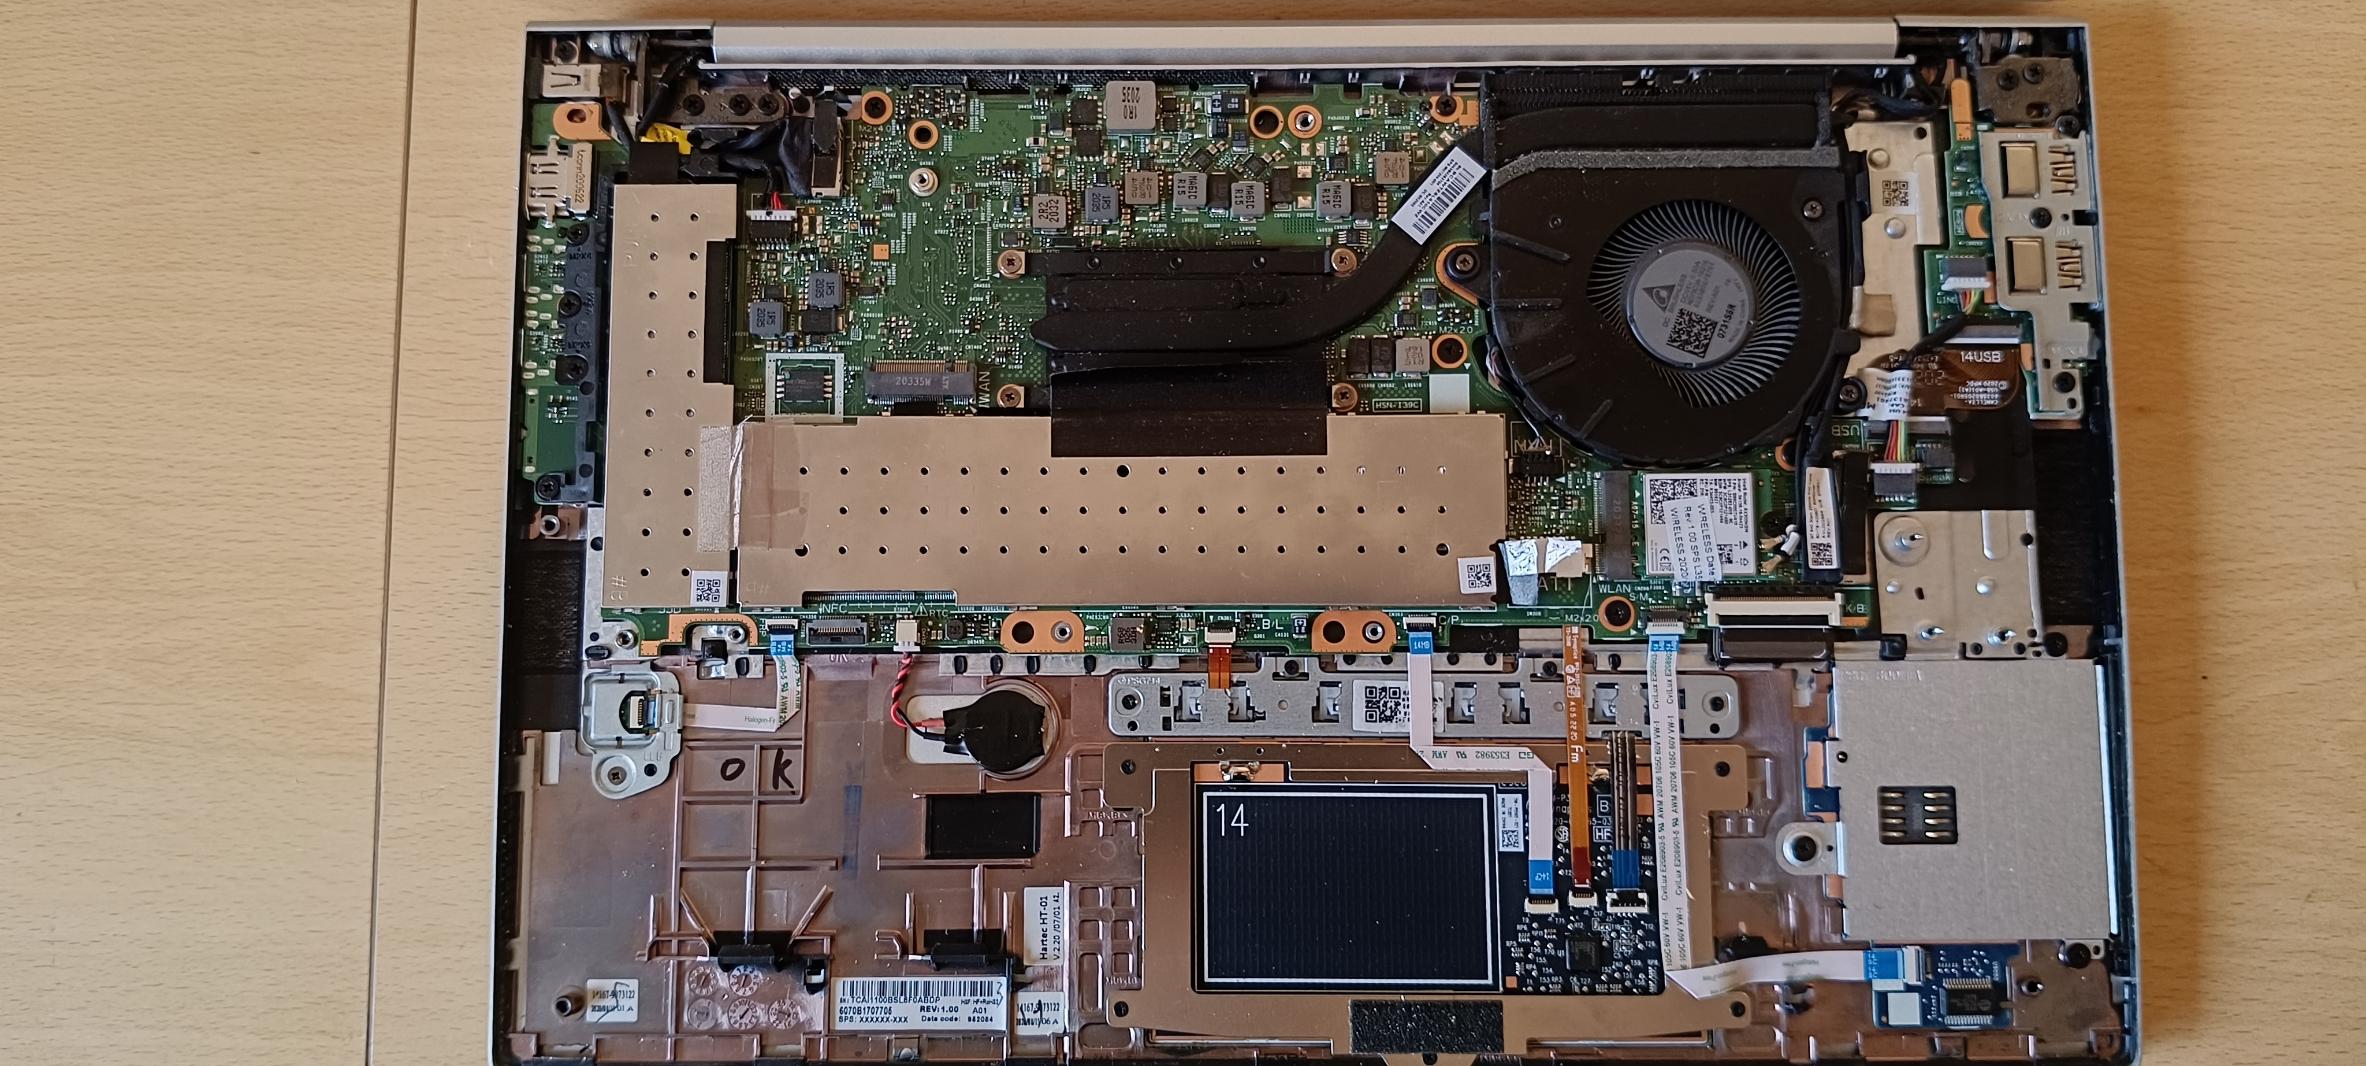
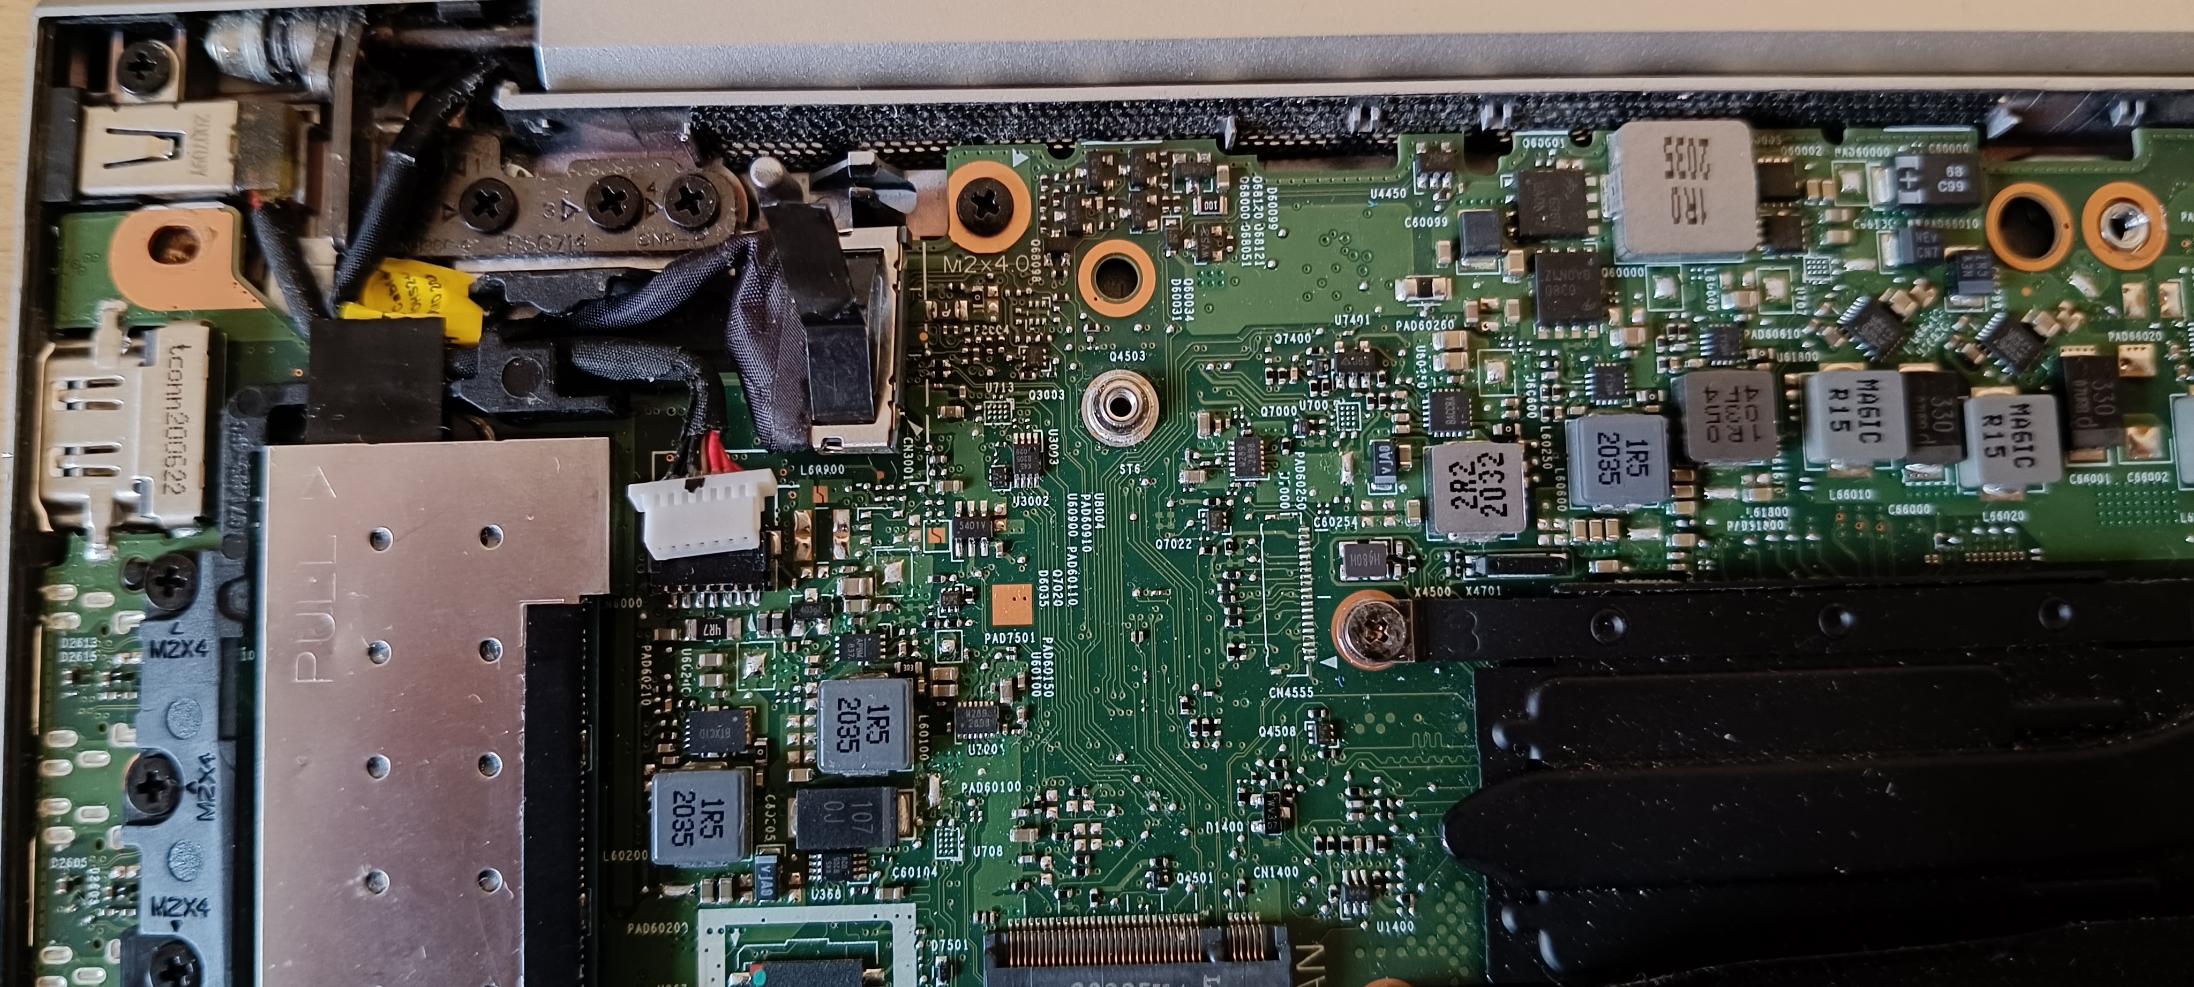
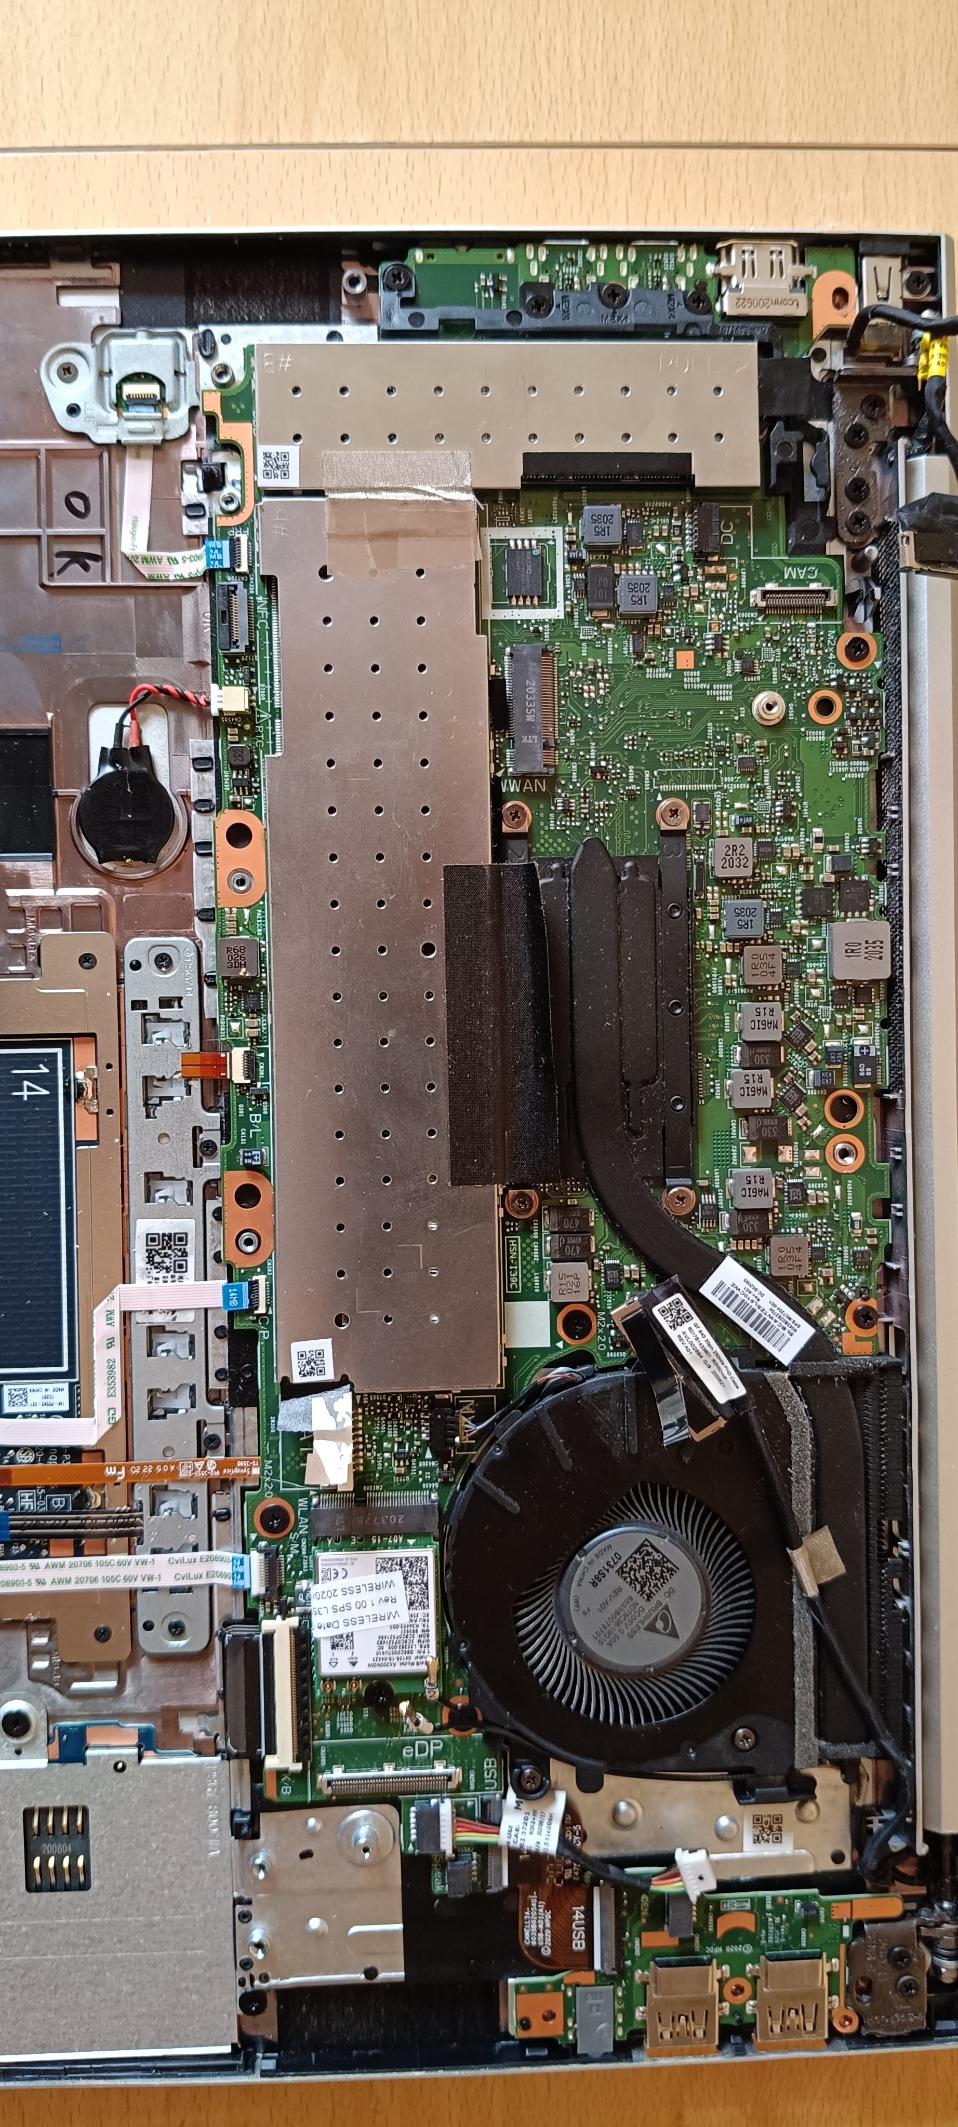
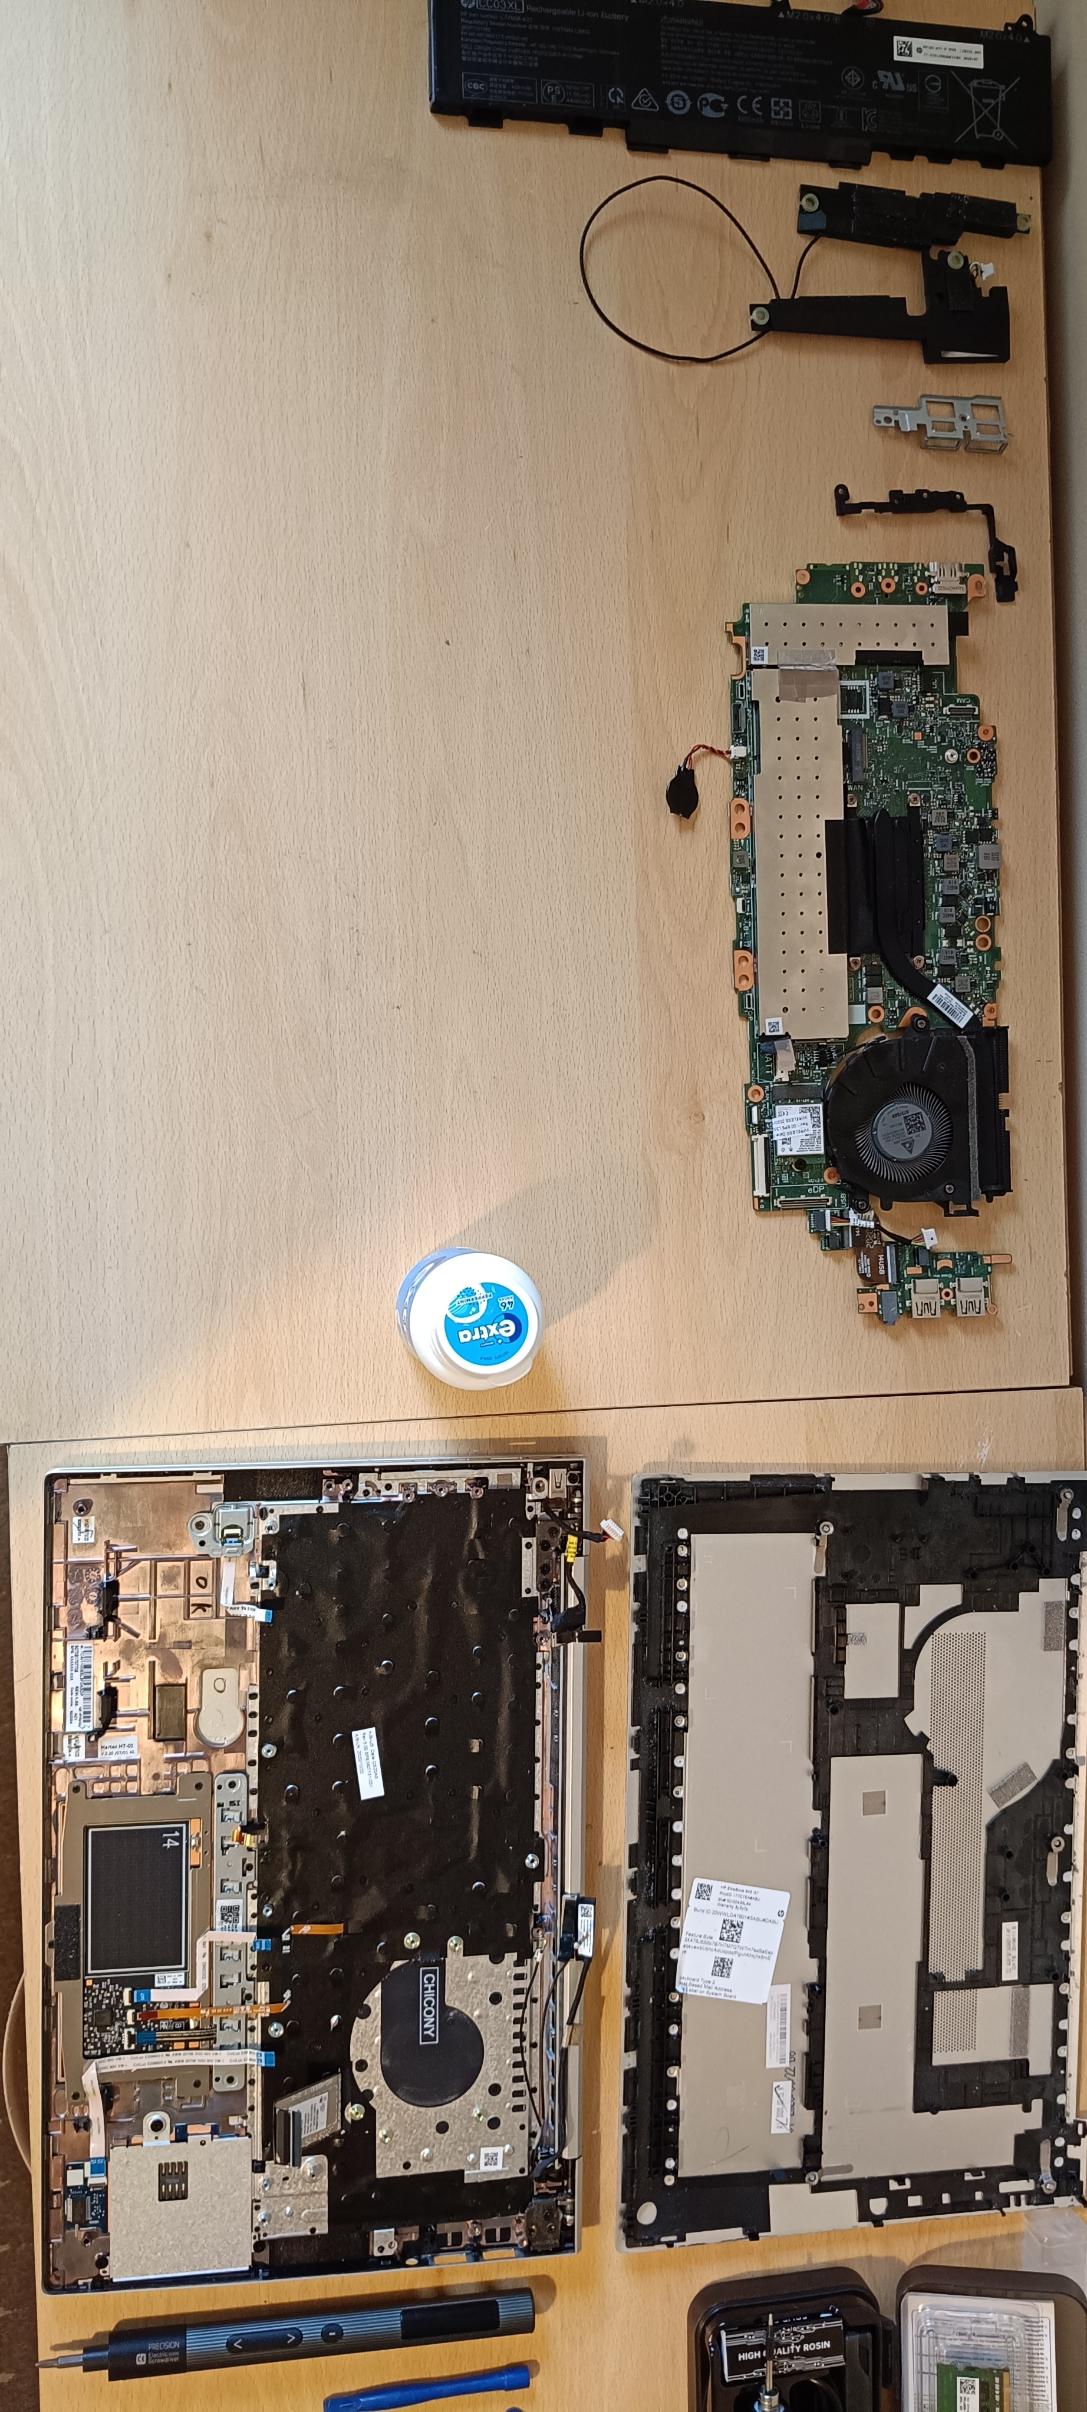
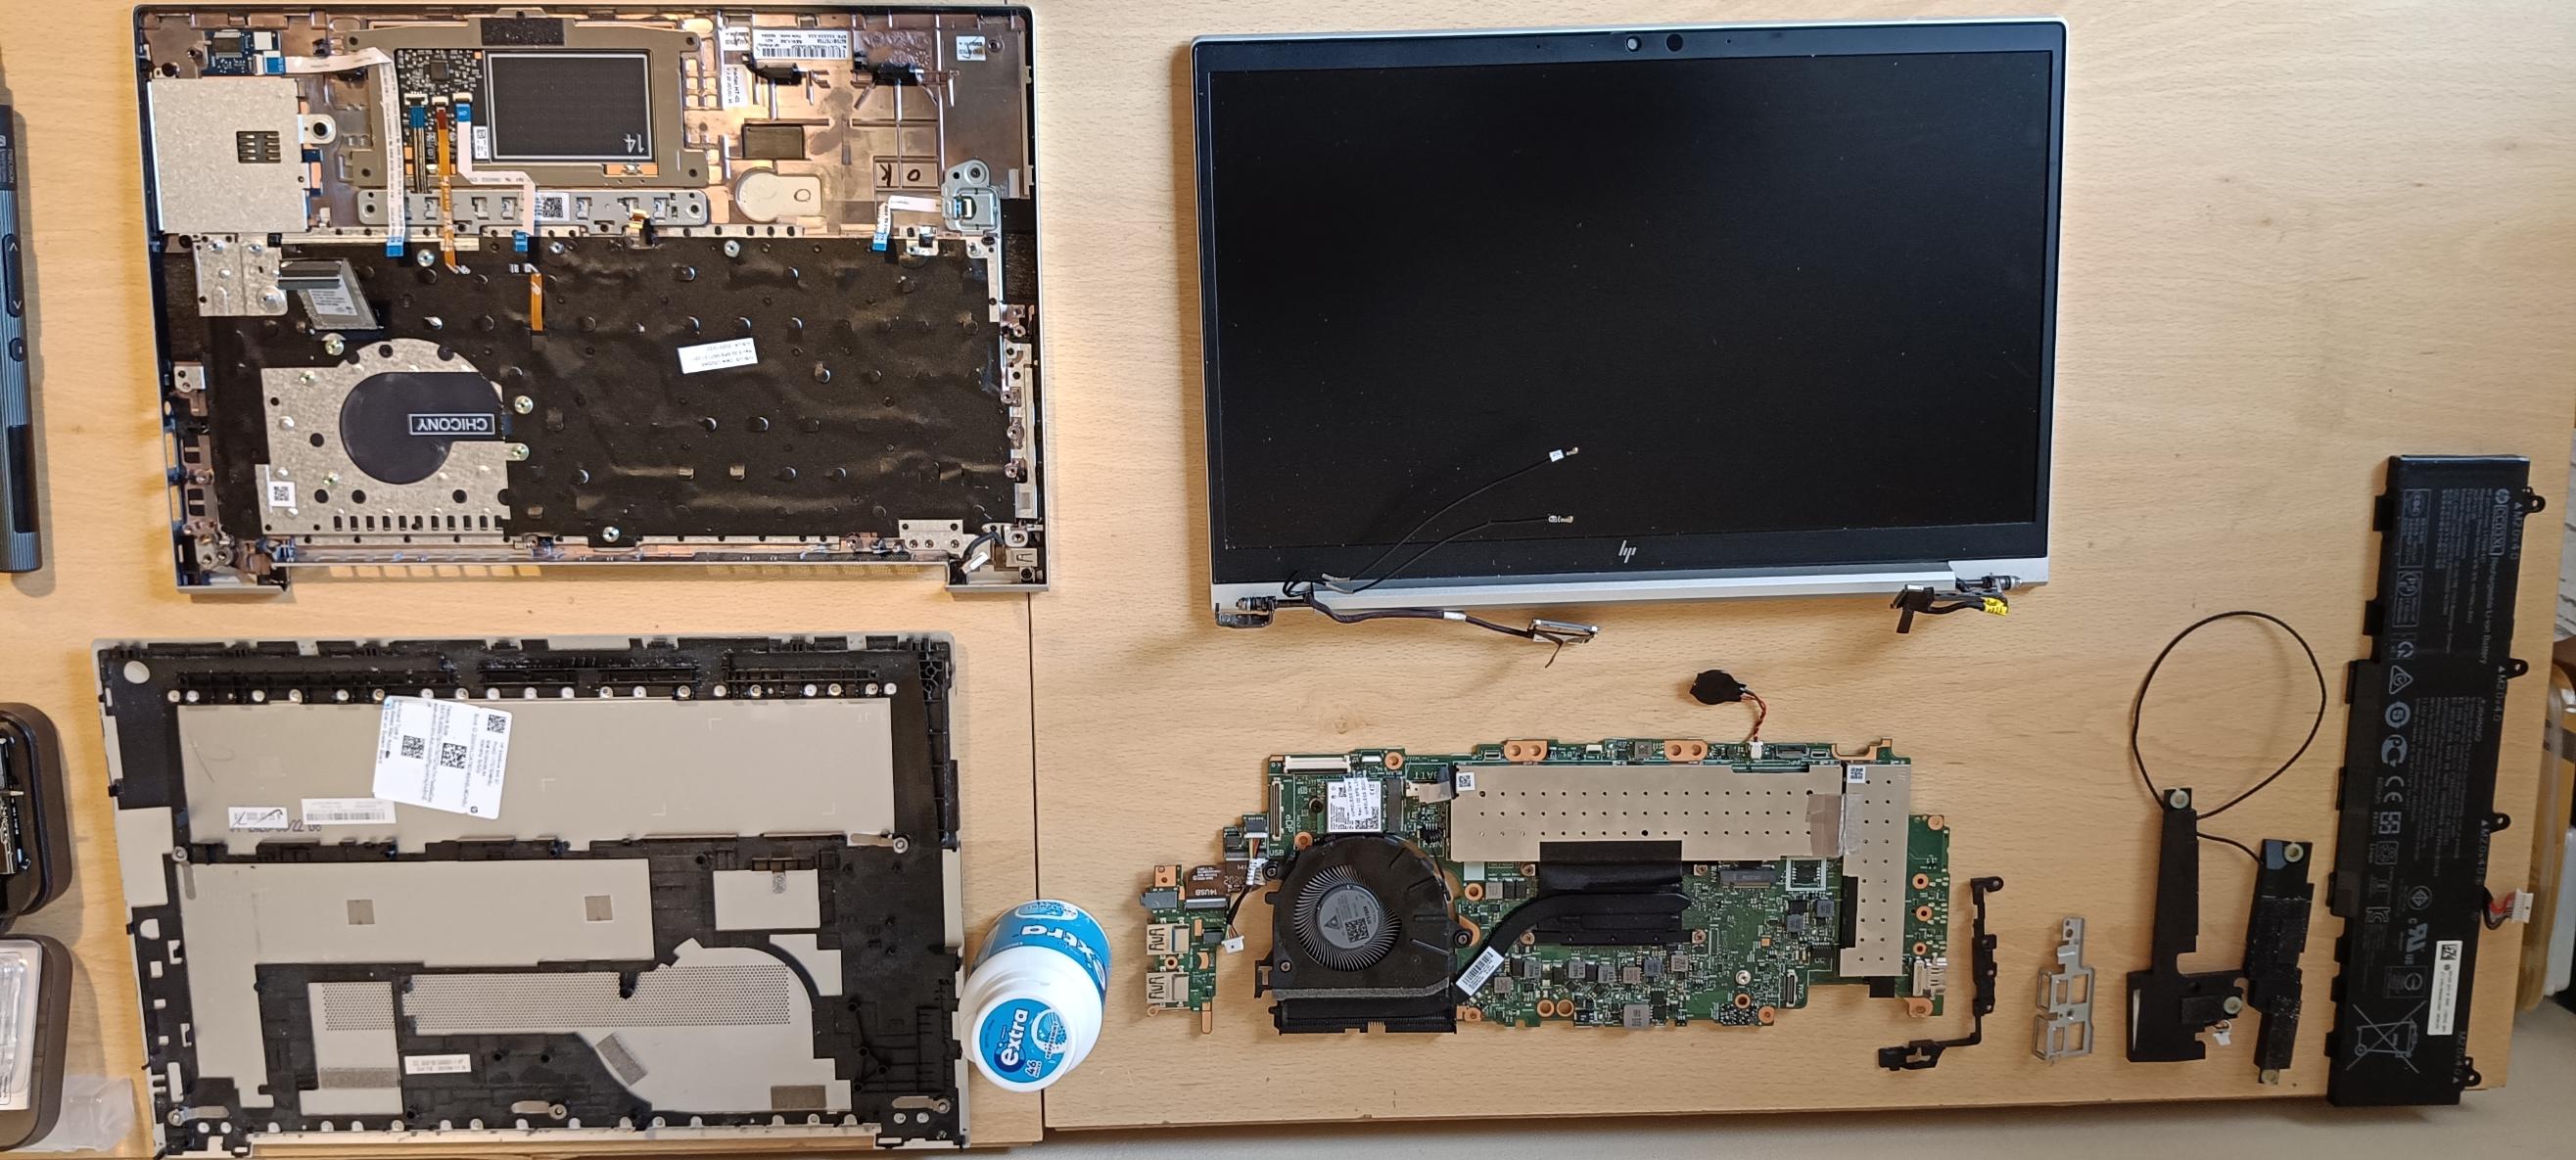
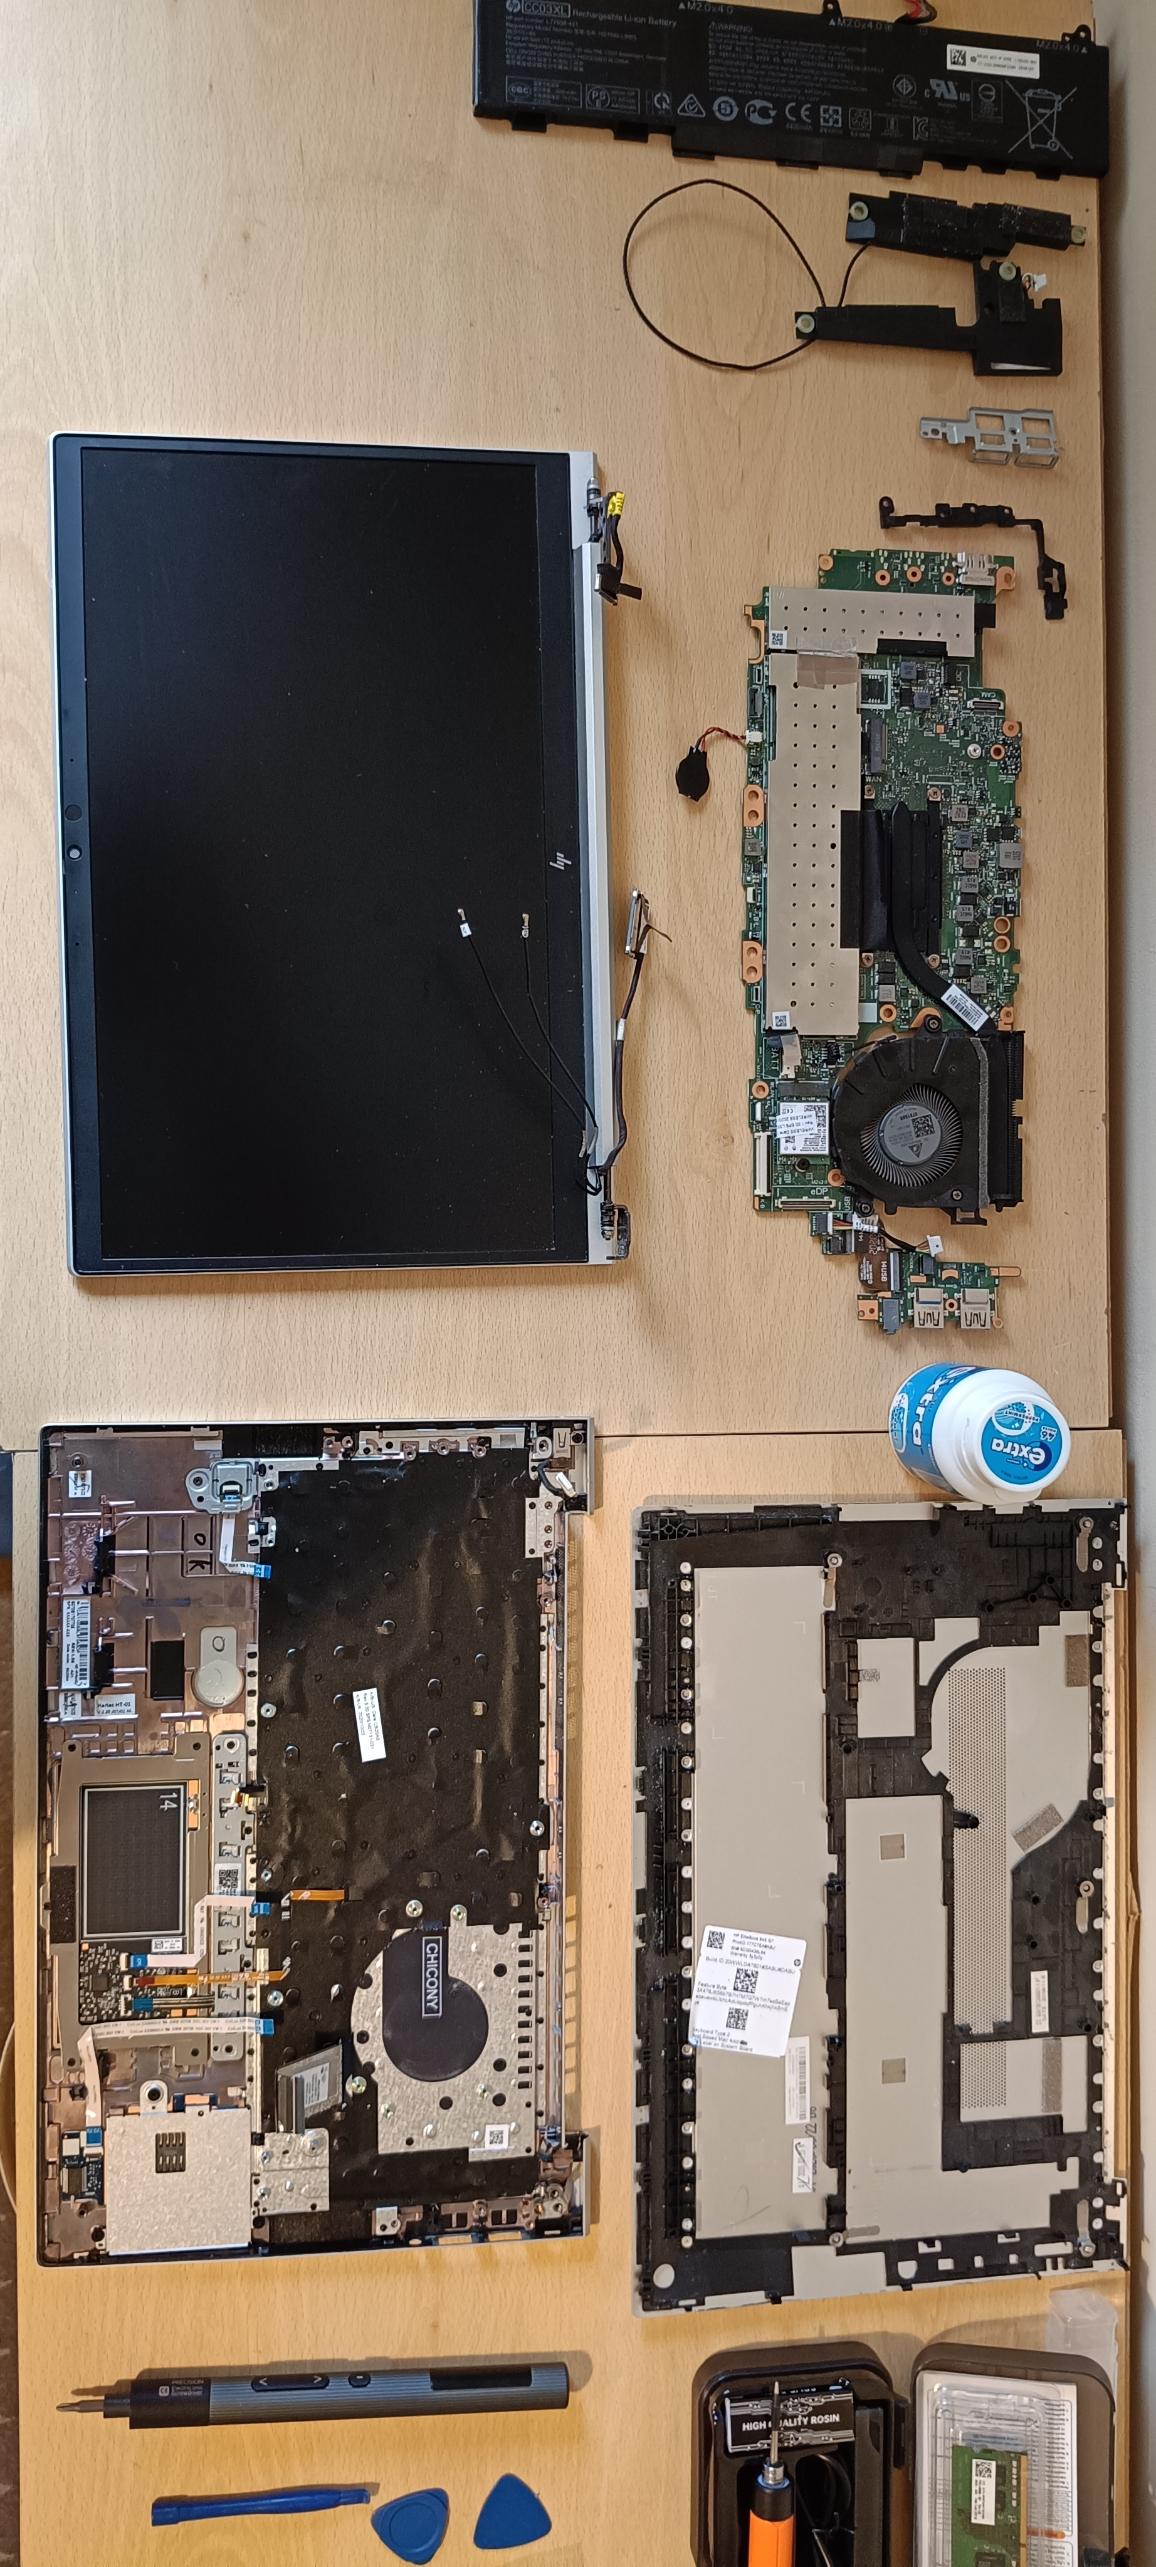
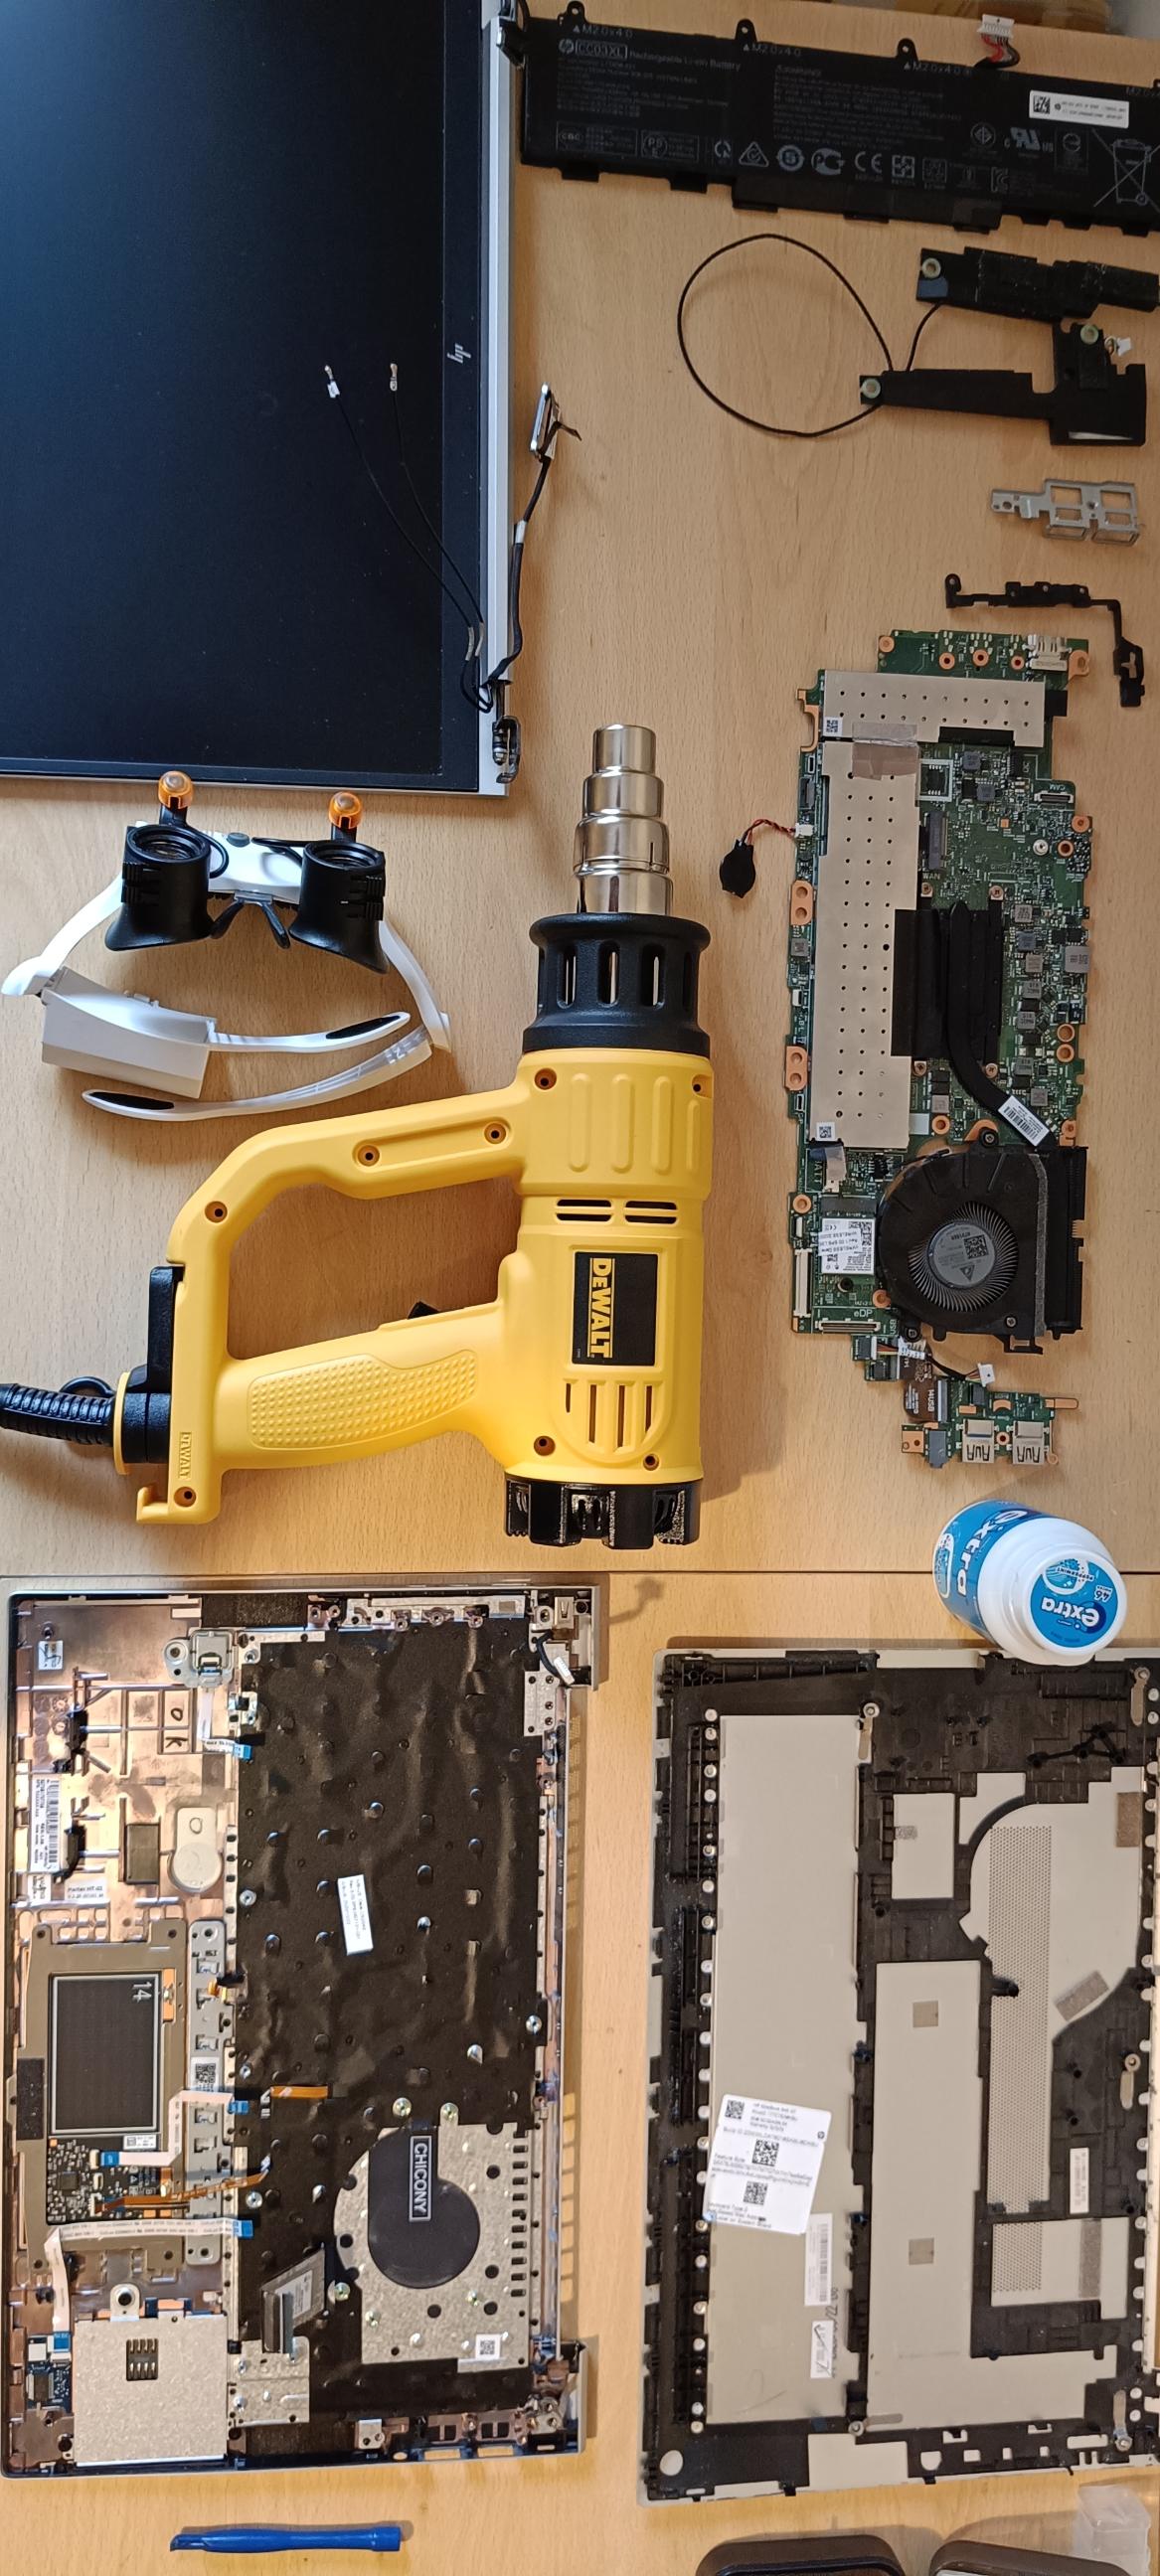
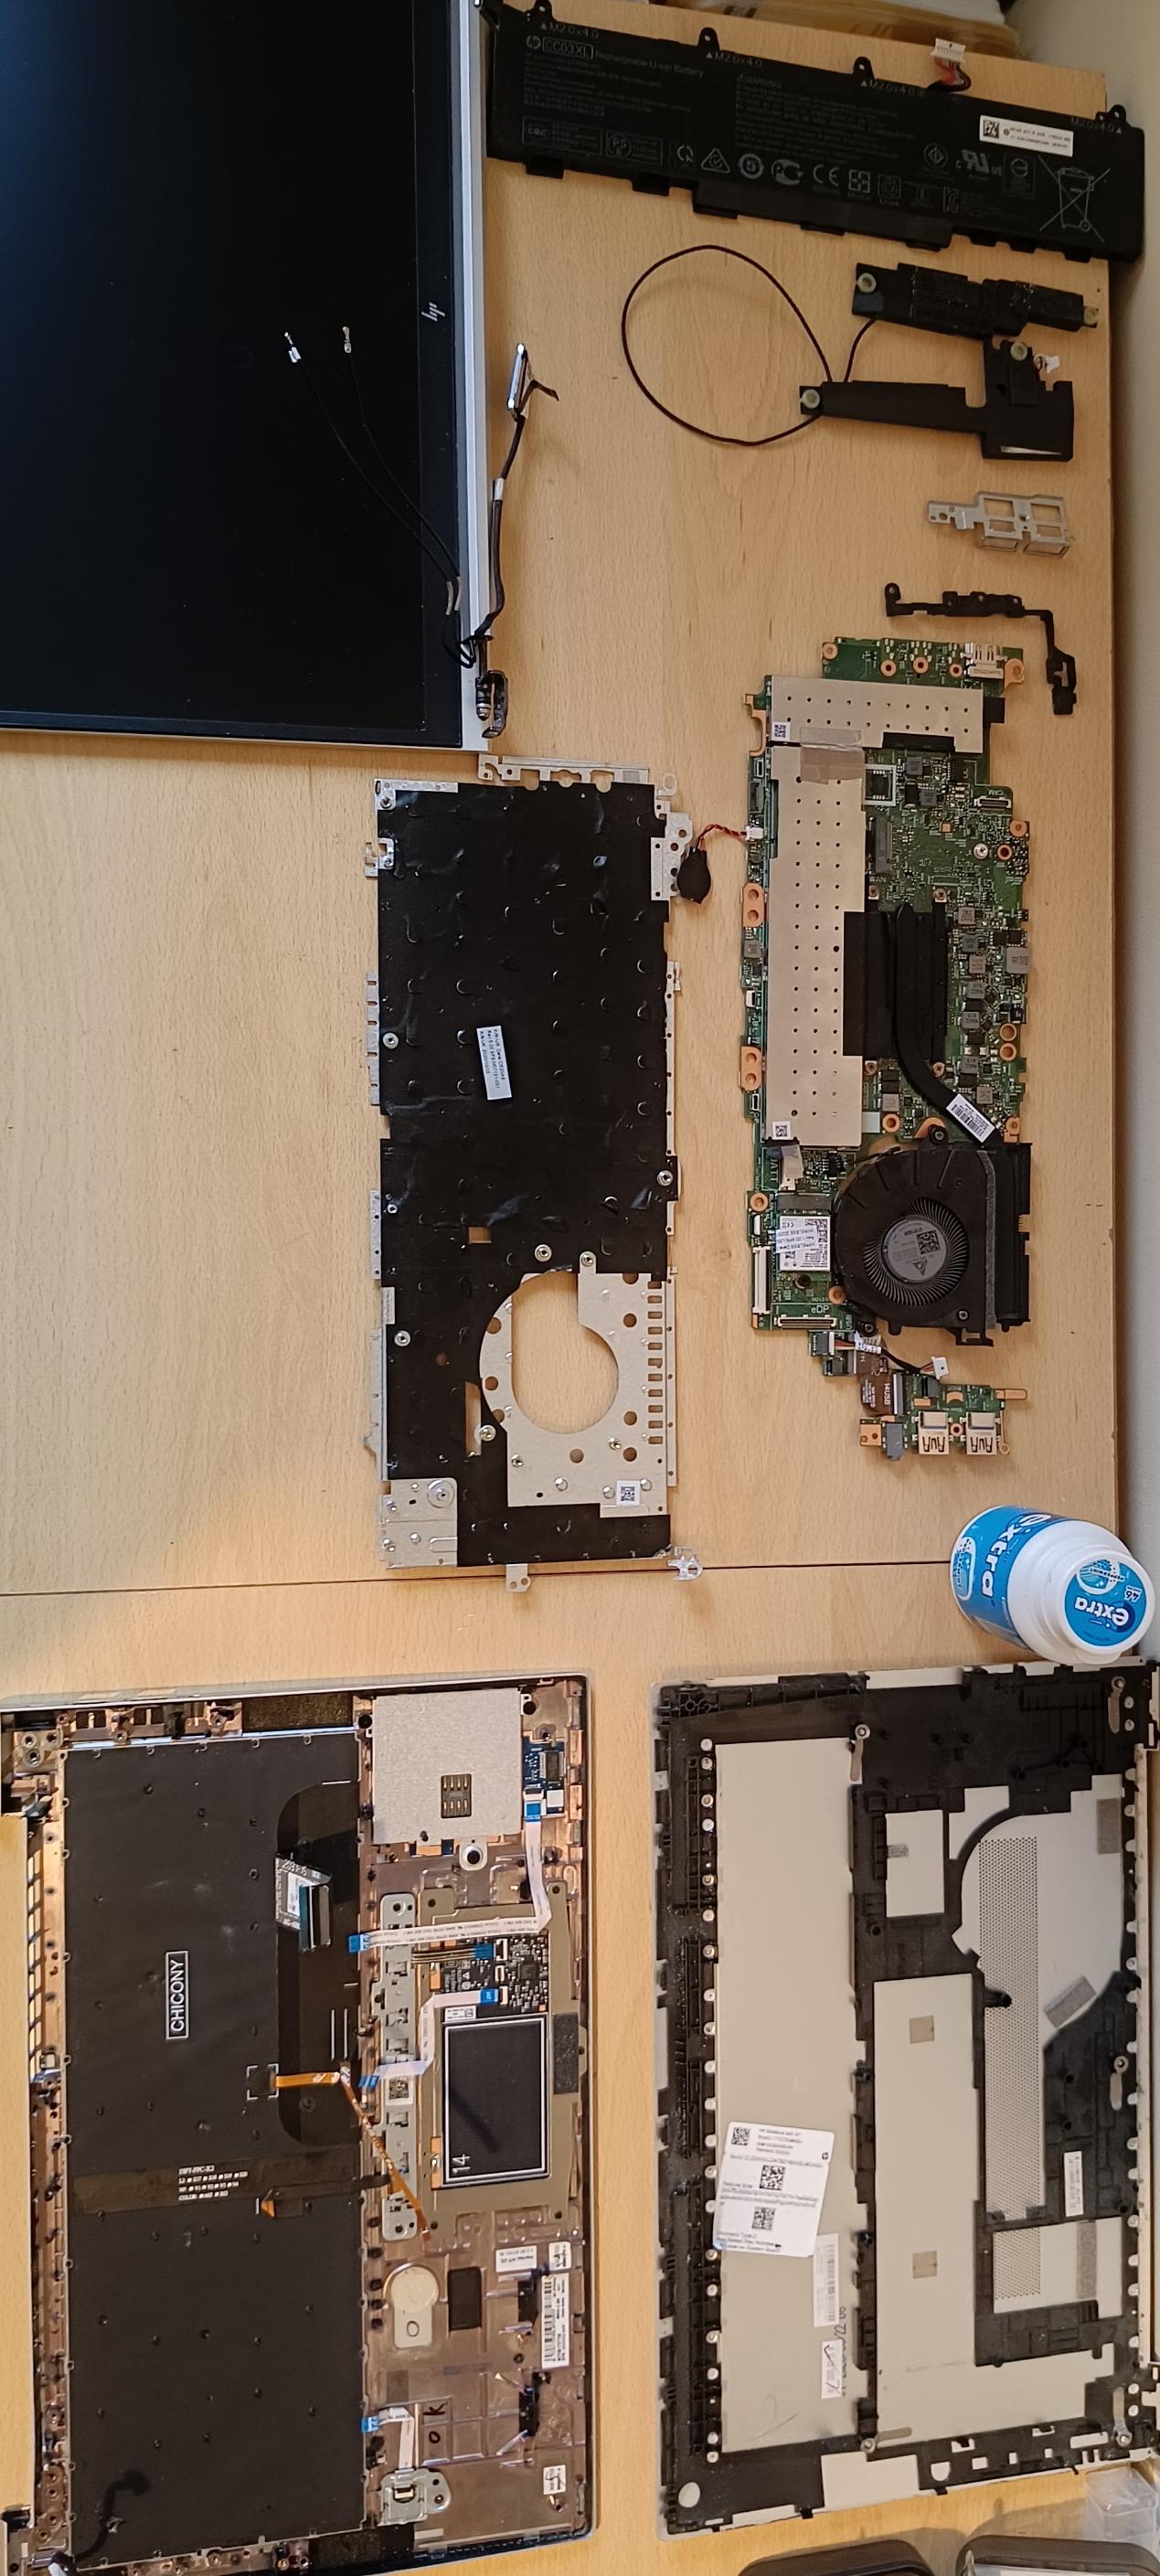
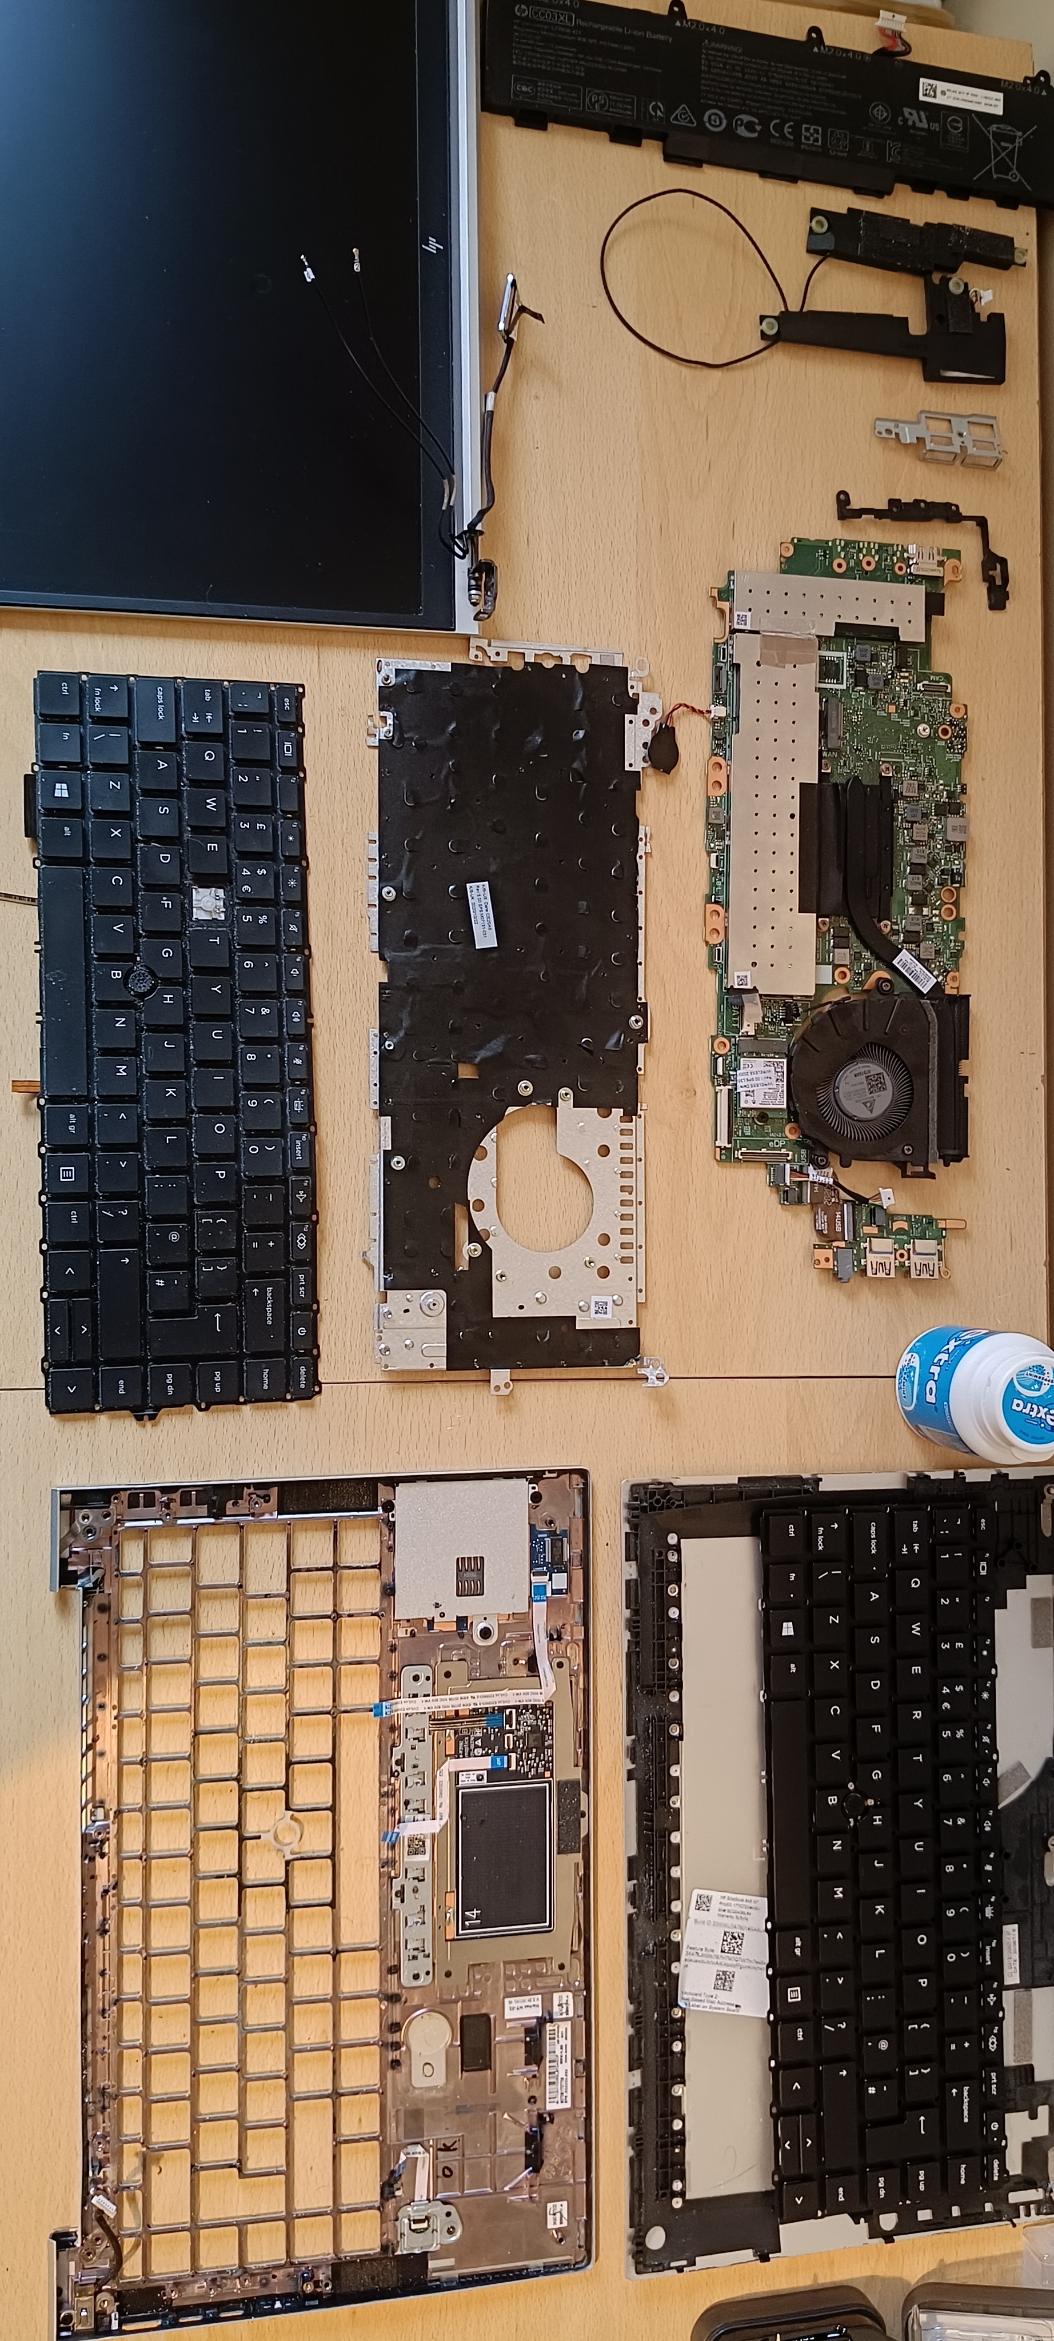
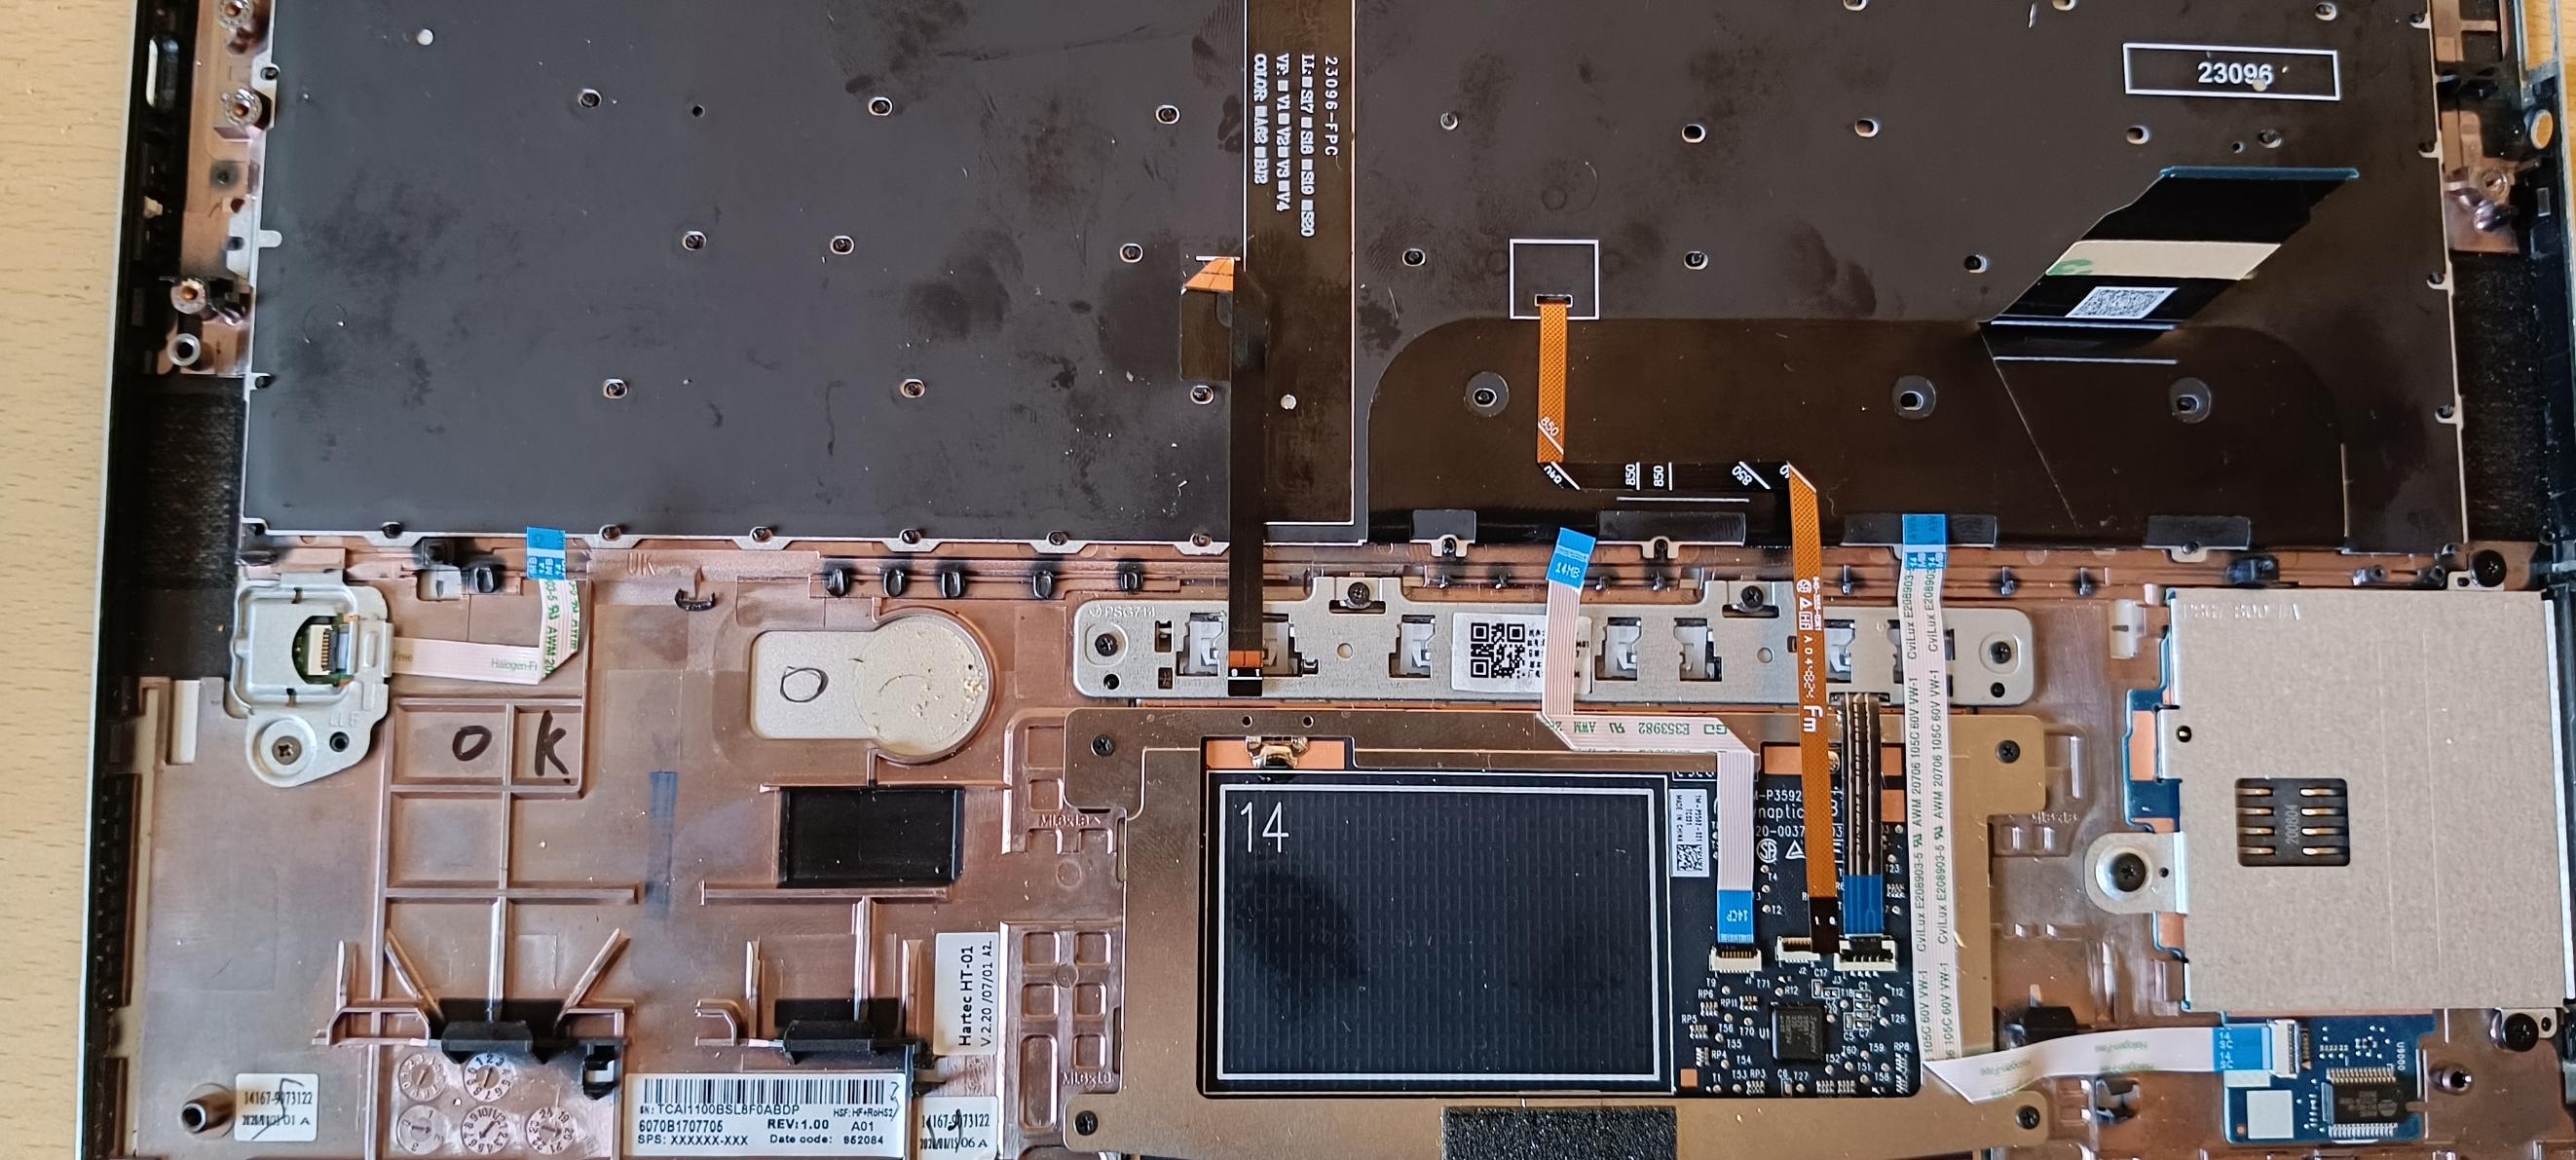
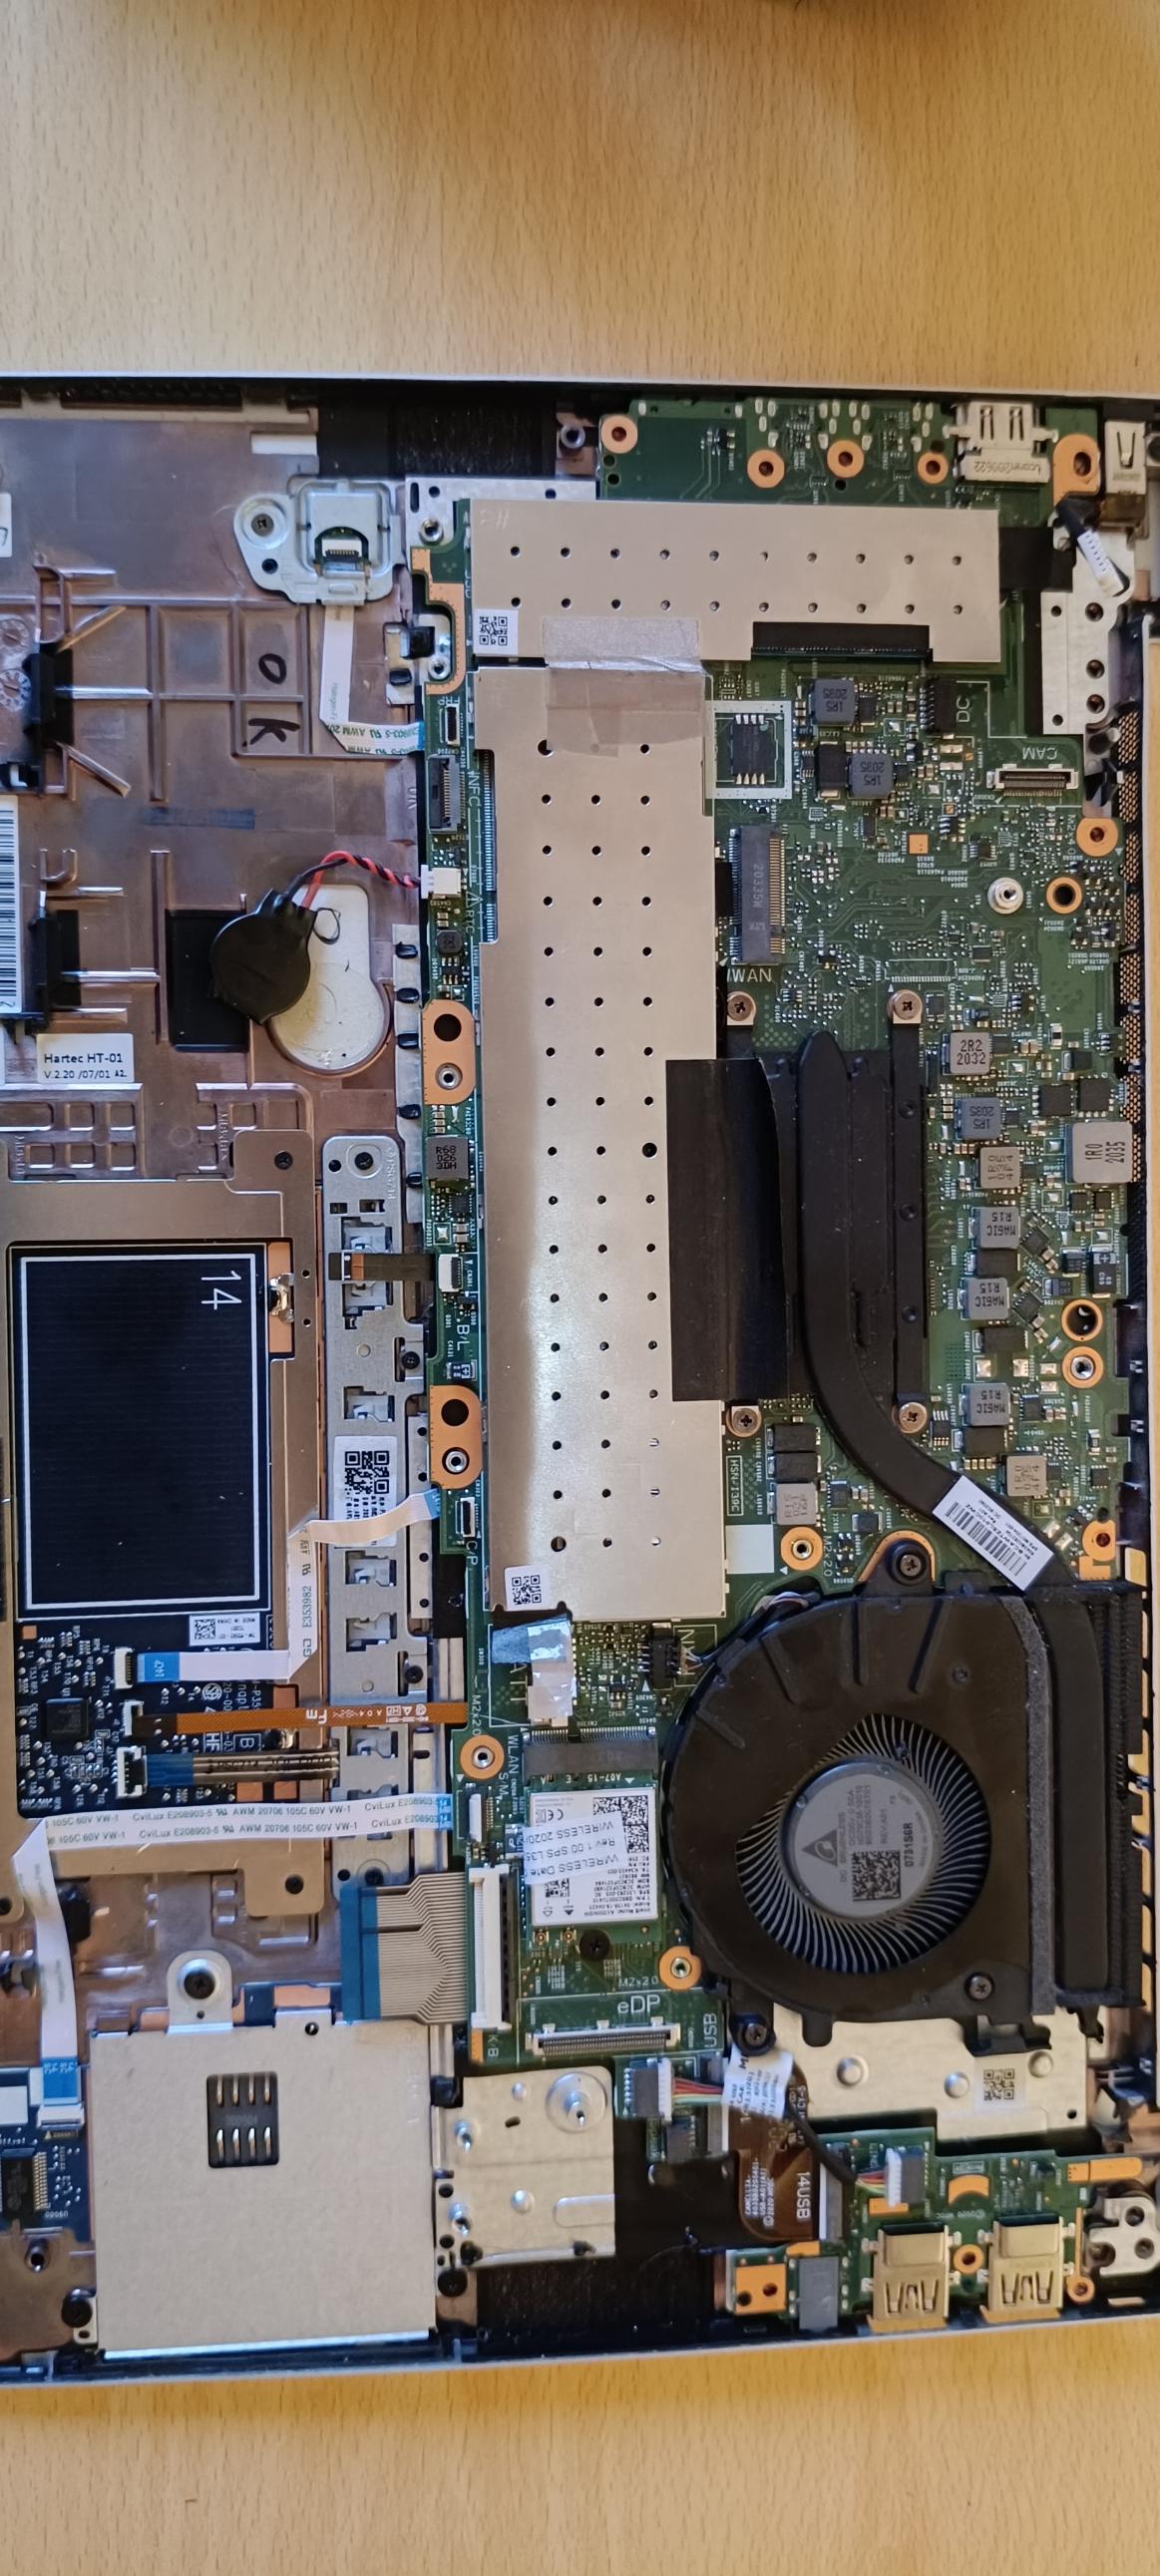
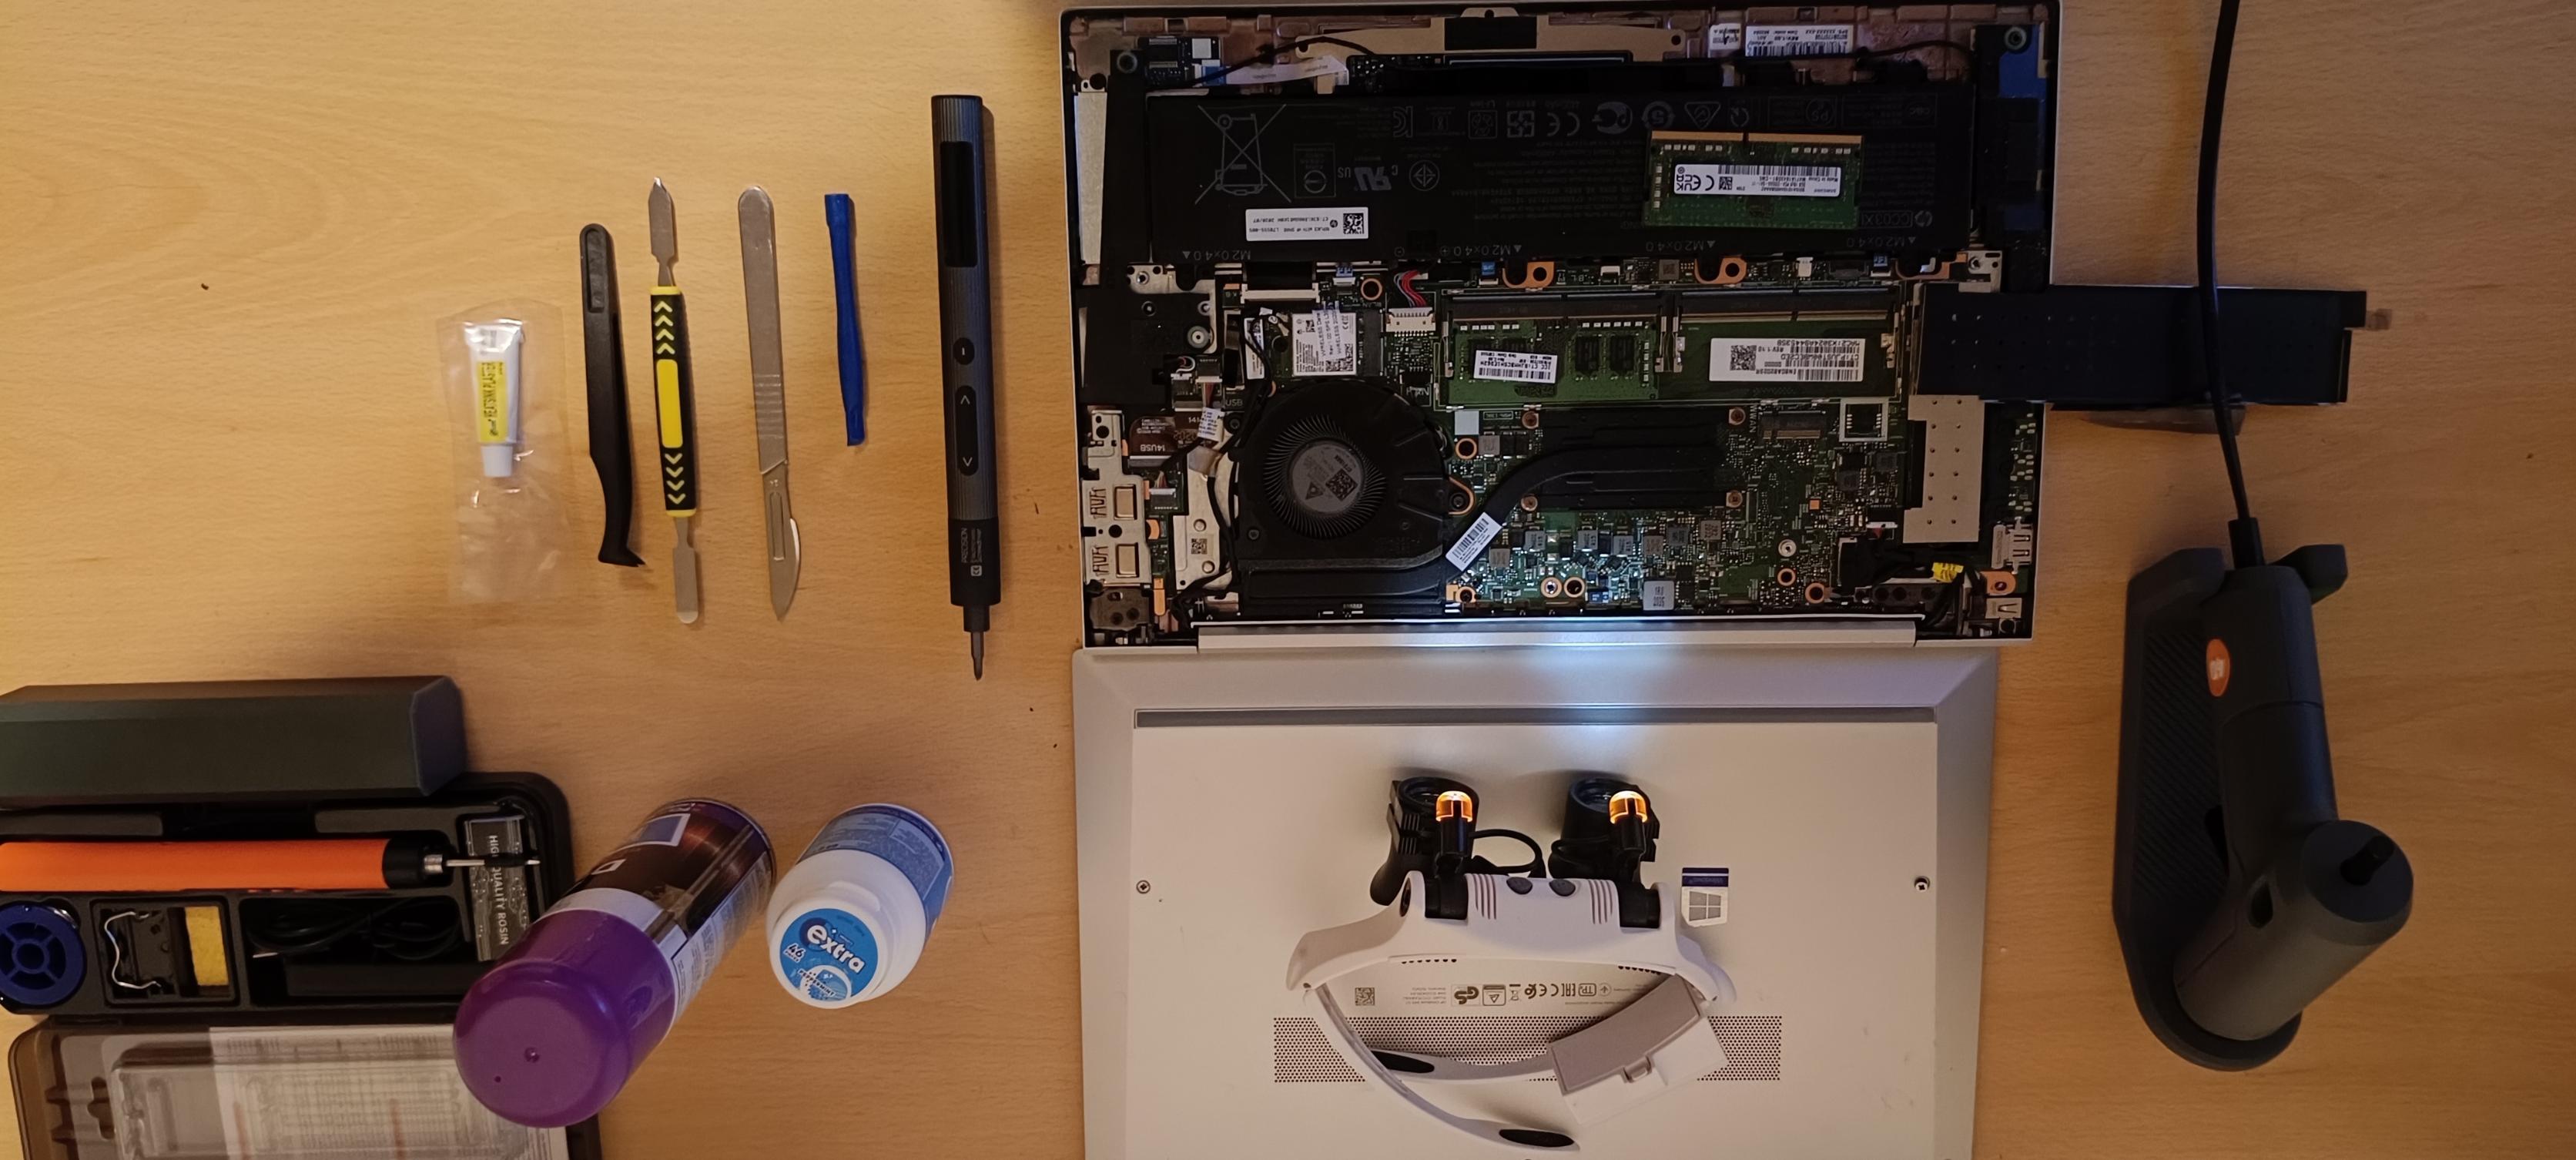
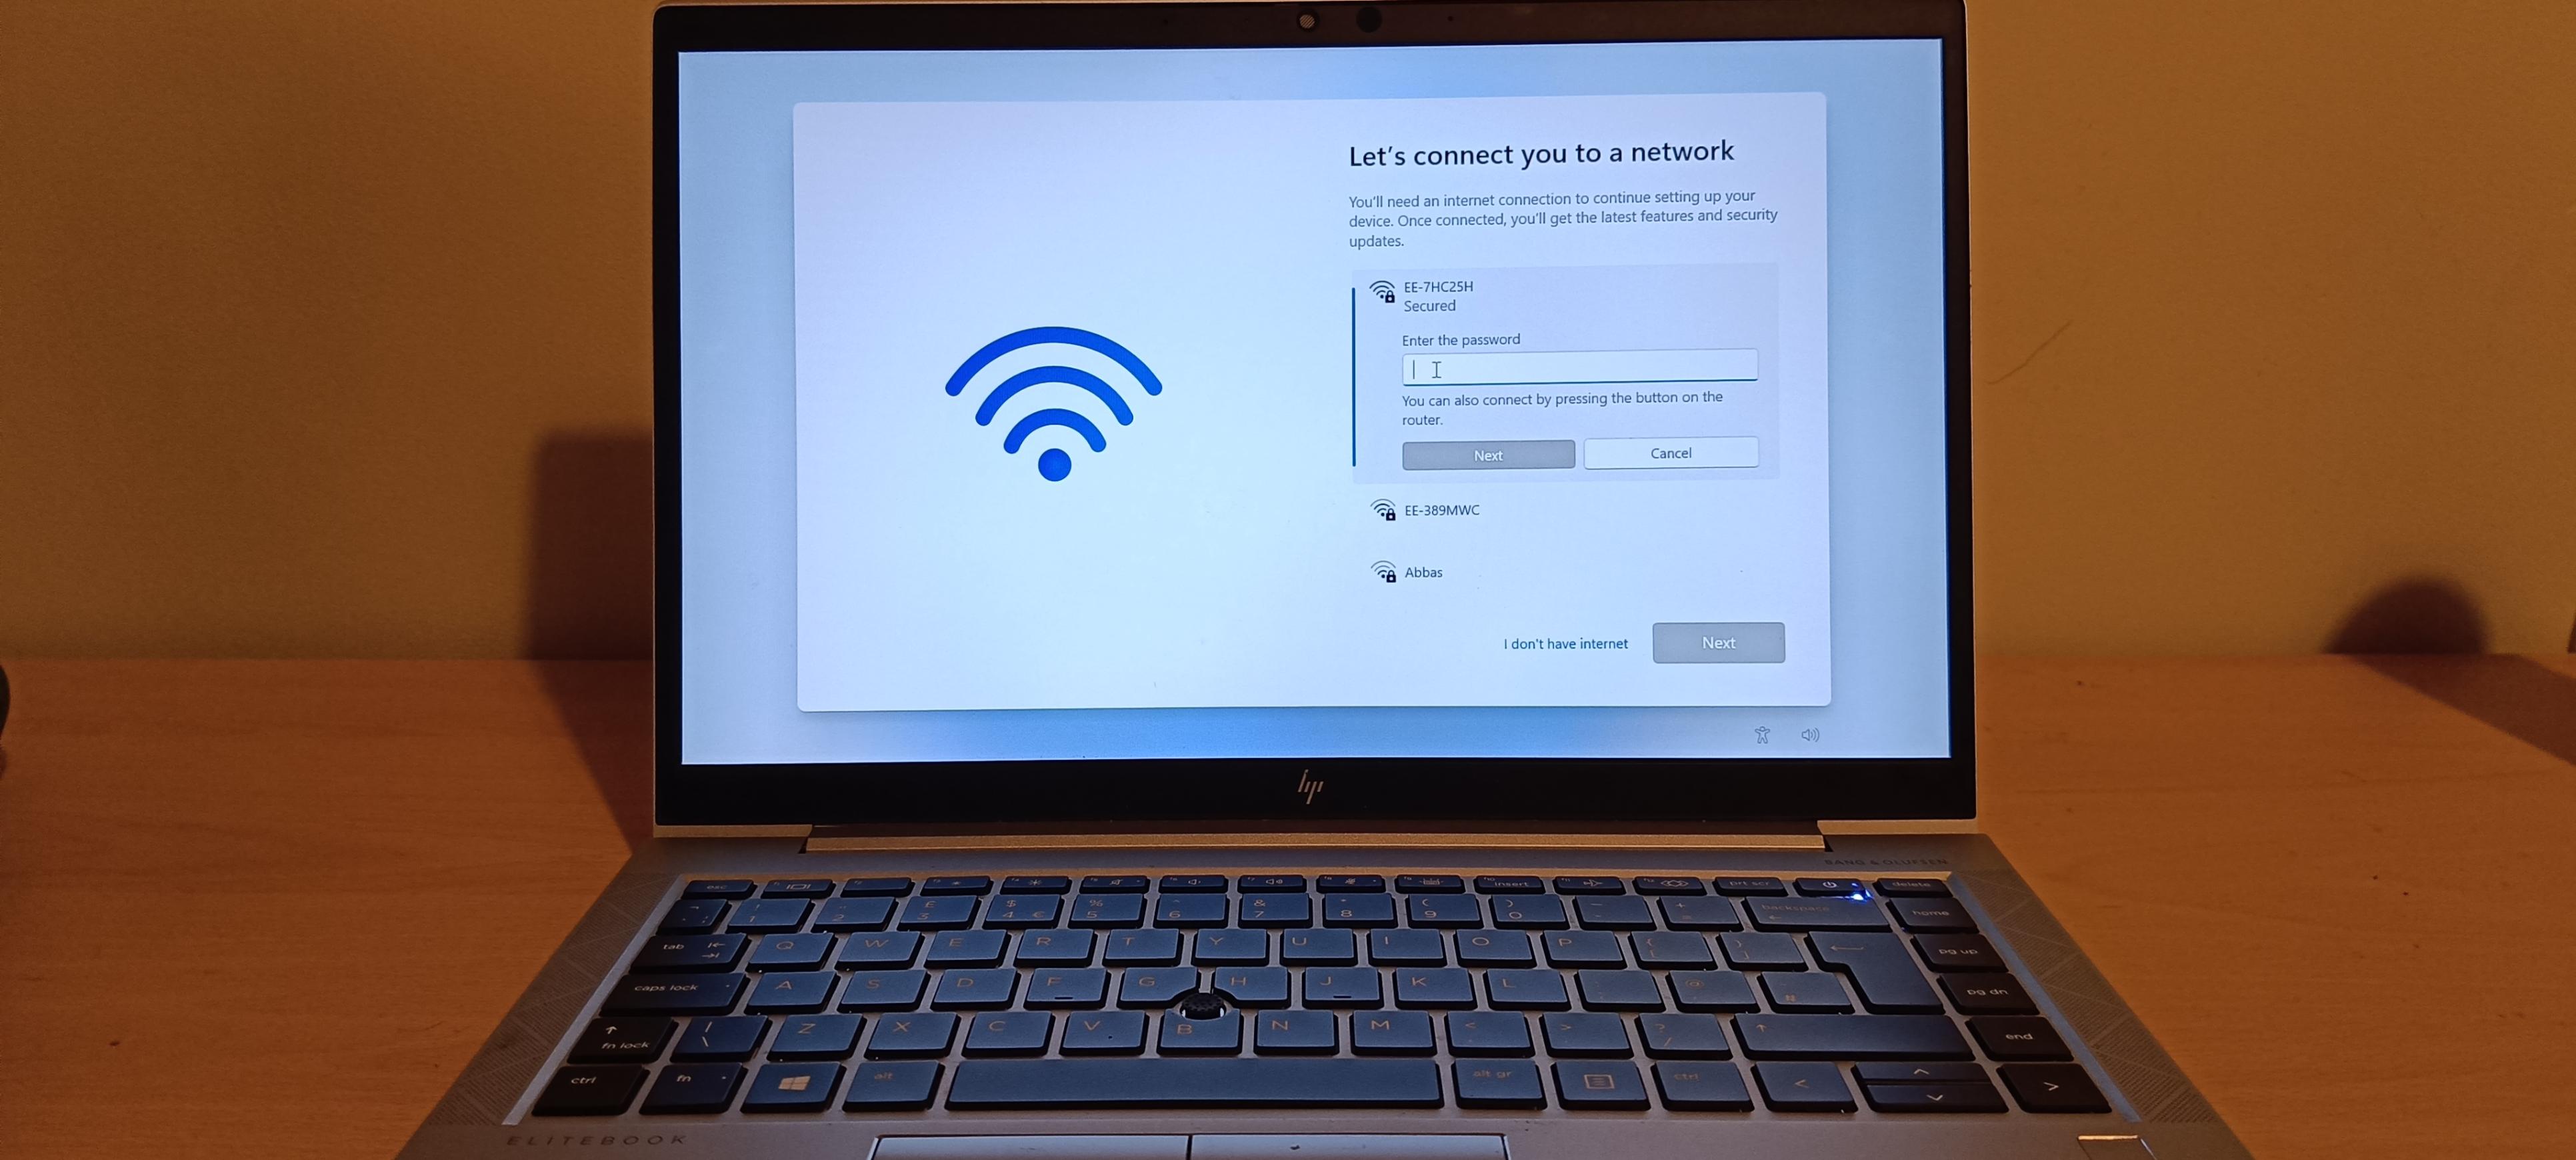
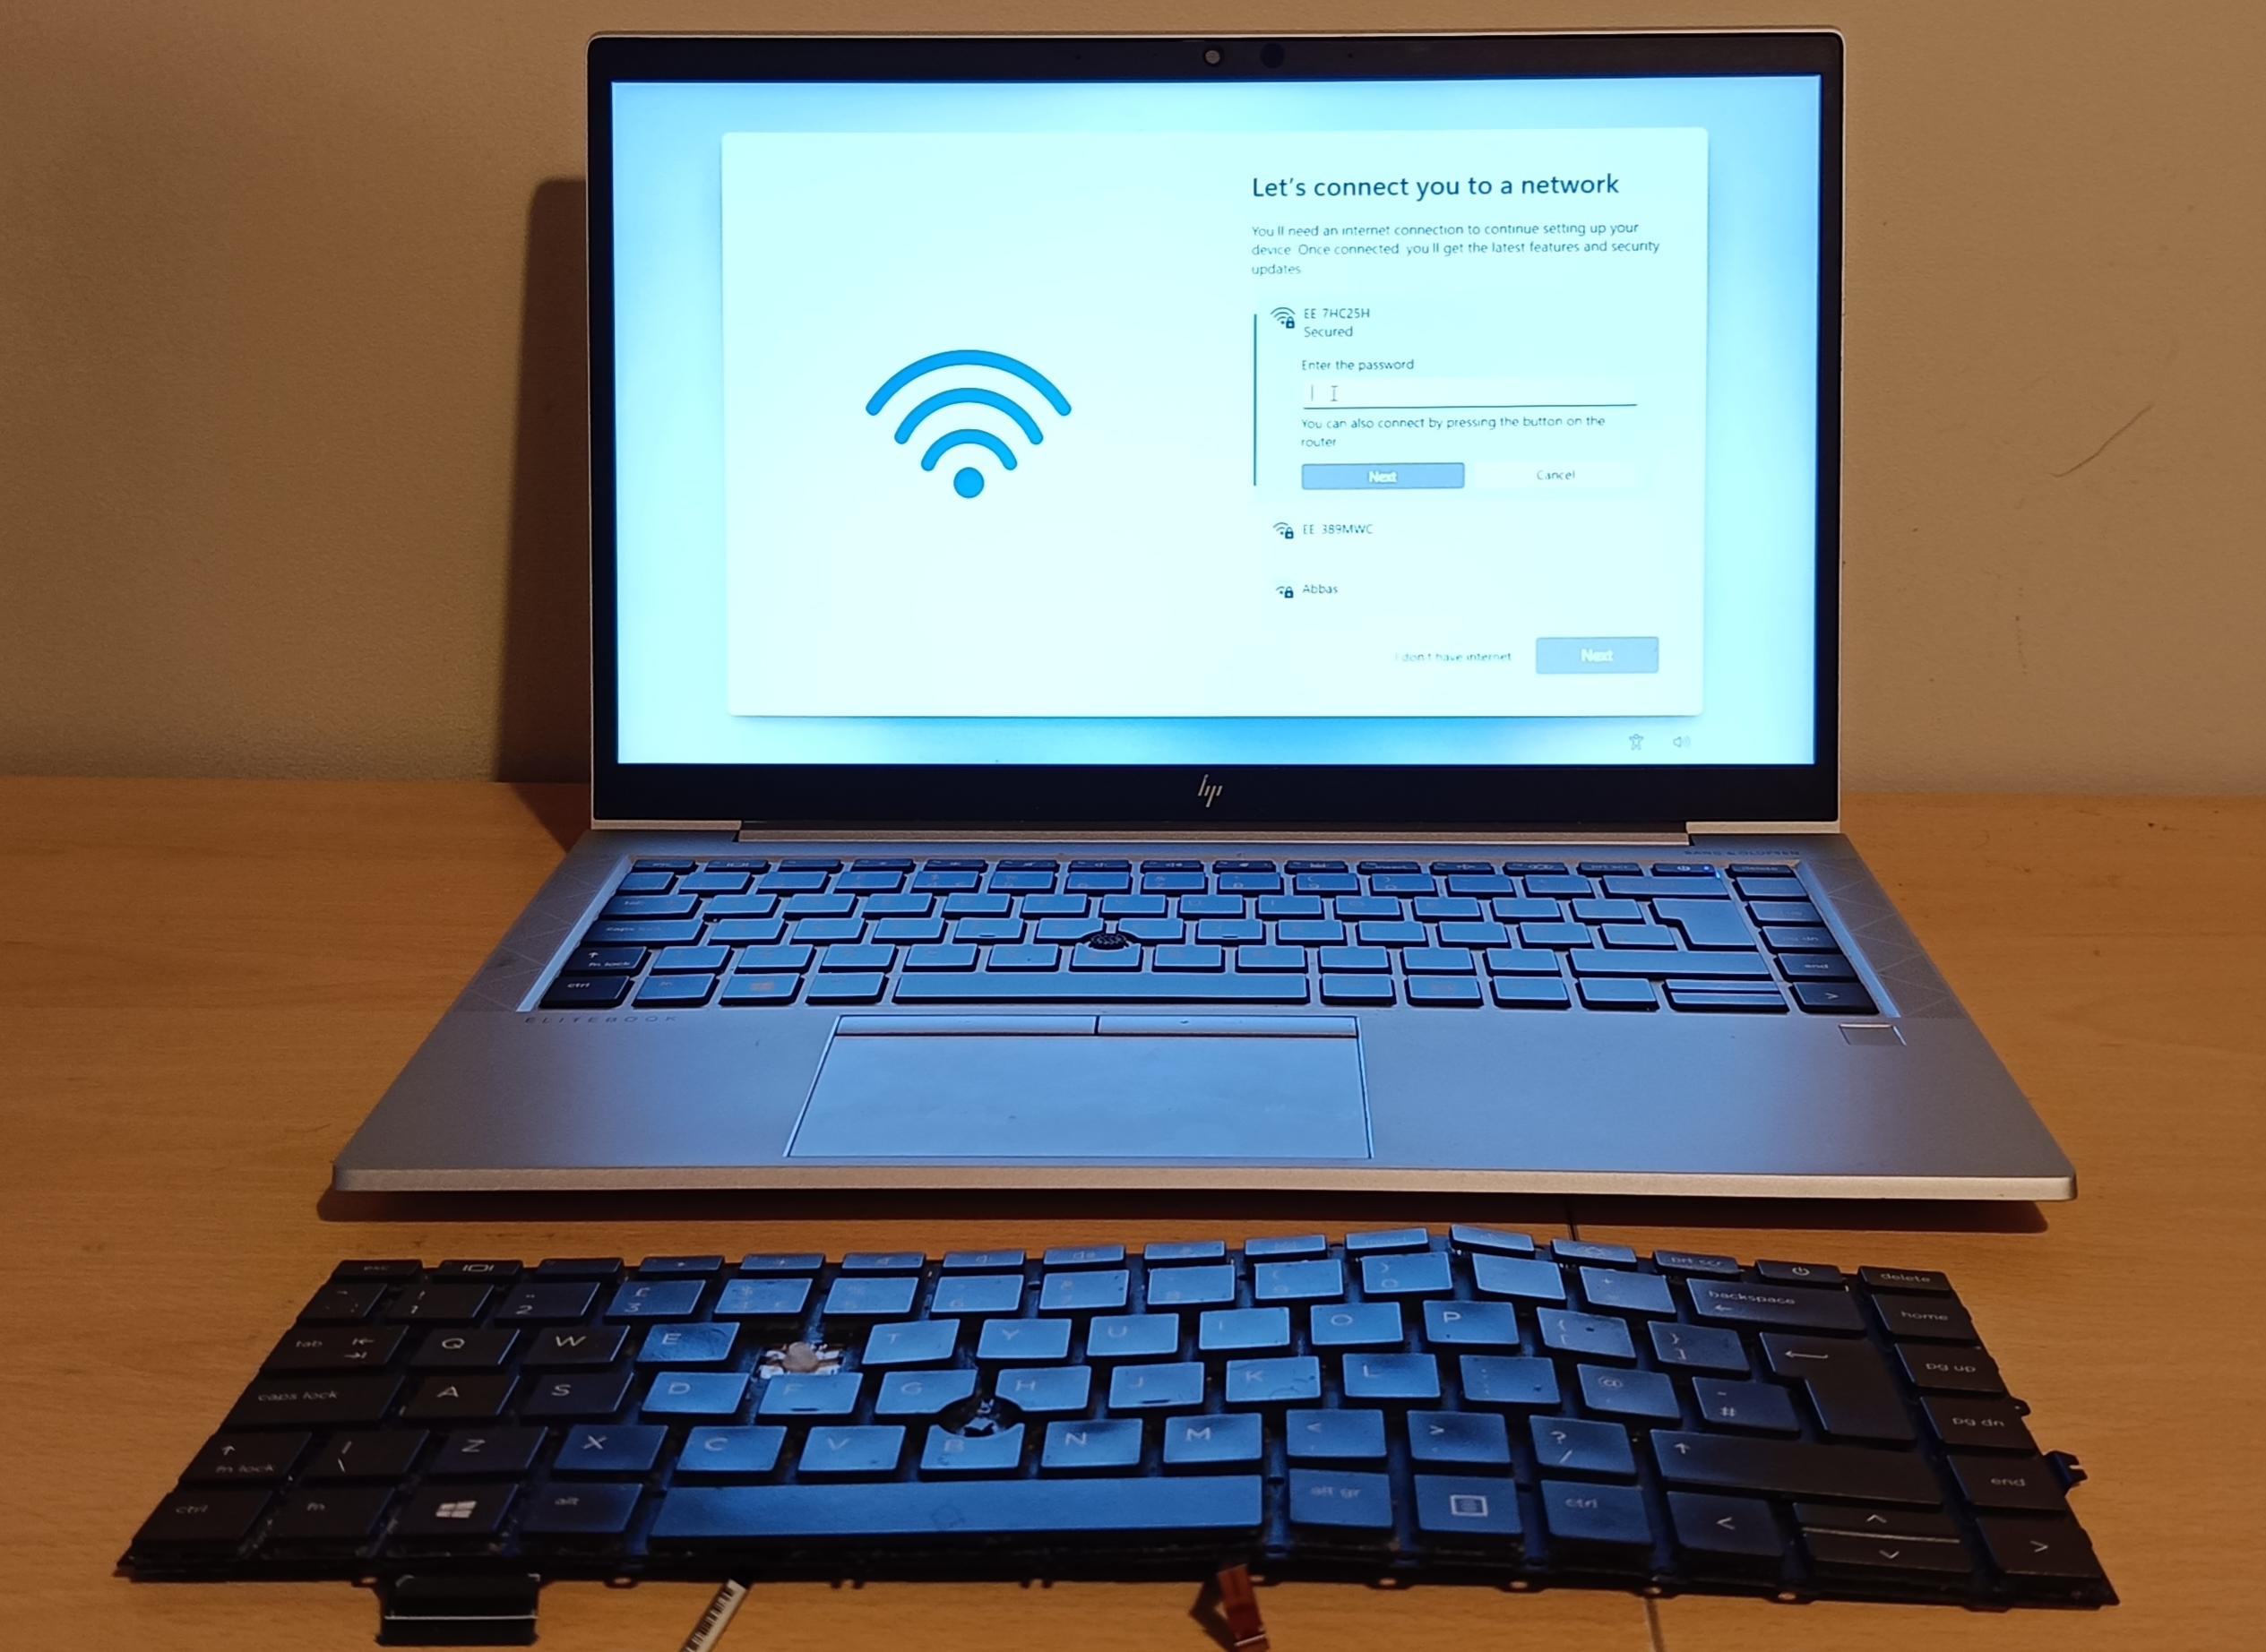
Complete photographic record of the repair and upgrade process. Click any image to enlarge.

All functionality tested systematically after reassembly. No issues found.
| Test | Result |
|---|---|
| Device powers on cleanly | ✓ PASS |
| All keys functional — including R, T, and Y | ✓ PASS |
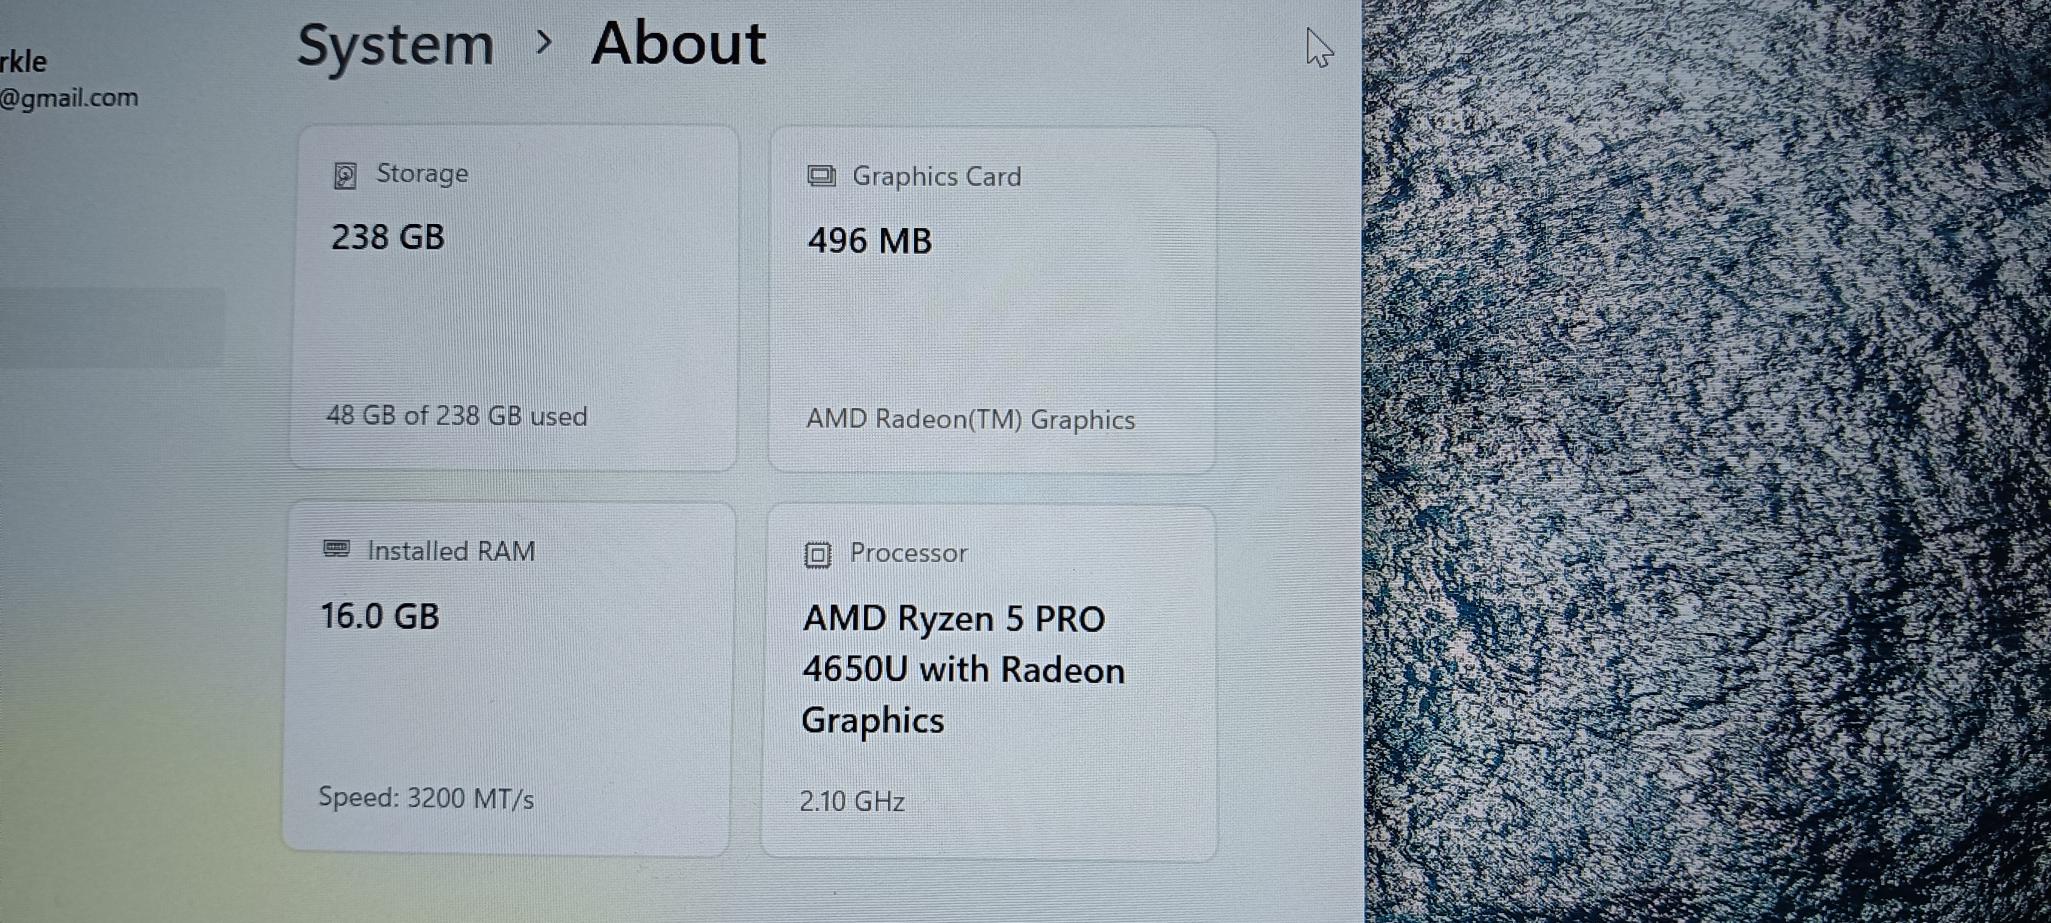
| RAM detected: 16.0 GB @ 3200 MT/s | ✓ PASS |
| Dual-channel operation confirmed in System Info | ✓ PASS |
| Windows 11 OOBE completed successfully | ✓ PASS |
| Wi-Fi adapter detected; networks visible | ✓ PASS |
| Display — no artefacts or dead pixels | ✓ PASS |
| Trackpad and fingerprint reader functional | ✓ PASS |
| All USB and I/O ports functional | ✓ PASS |
| Fan spin-up and thermal management normal | ✓ PASS |
System confirmed: AMD Ryzen 5 PRO 4650U · 16.0 GB DDR4 @ 3200 MT/s · 238 GB SSD · AMD Radeon Graphics